This page describes the procedures for using MyoFInDer and its different features. Everything you have to know about the module is explained here, please report it if you consider that this section is incomplete.
Index of the Usage page :
1. Starting MyoFInDer
There are two possible ways to start MyoFInDer, depending on if the application was installed using the Windows installer or not. This section re-uses names introduced on the Installation page, so it is advised to first read the Installation page before this one.
1.1 Using the shortcuts (Windows installer only)
The first and most straightforward way to start MyoFInDer is to click on the Menu-bar or Desktop shortcuts that were created when running the Windows installer. It can also be started by searching for “MyoFInDer” in the Menu-bar, or by any other standard way offered by Windows for opening applications.

1.2 From the command line
In this section, replace python with python3 or python3.x
(9<=x<=13) if necessary.
The commands below are intended for experimented users who know what they’re doing ! Do not try to run them unless you understand what they do ! If you face any problem with starting MyoFInDer and don’t know what to do, please refer to the Troubleshooting page or get in touch with the maintainer.
1.2.1 After manual installation
No matter which installation method you chose, it is always possible to start MyoFInDer from the command-line. This operation is however a bit more complex if you used the Windows installer, so this specific case is covered separately in the next subsection.
If you installed MyoFInDer in a virtual environment, you should first activate it :
C:\Users\User><Path to your venv>\Scripts\activate.bat
(venv) C:\Users\User>
With <Path to your venv> the path to the virtual environment you created.
Or in Linux :
user@machine:~$ source <Path to your venv>/bin/activate
(venv) user@machine:~$ █
Then, you can simply start MyoFInDer by running the following line (ignore
the venv part if not running in a virtual environment) :
(venv) C:\Users\User>python -m myofinder
Or in Linux :
(venv) user@machine:~$ python -m myofinder
1.2.2 After installation using the Windows installer
Starting MyoFInDer from the command-line might be your only option if for
some reason you cannot start it using the shortcuts created by the
installer (in which case you should report that as a bug). When run, the
installer deploys a virtual environment at
C:\Users\<User>\AppData\Local\MyoFInDer\venv, where <User> is your
username on the computer. First, activate this virtual environment by
running :
C:\Users\User>C:\Users\User\AppData\Local\MyoFInDer\venv\Scripts\activate.bat
(venv) C:\Users\User>
Then, you can start MyoFInDer the same way as described in the previous subsection :
(venv) C:\Users\User>python -m myofinder
1.3 Startup window and console
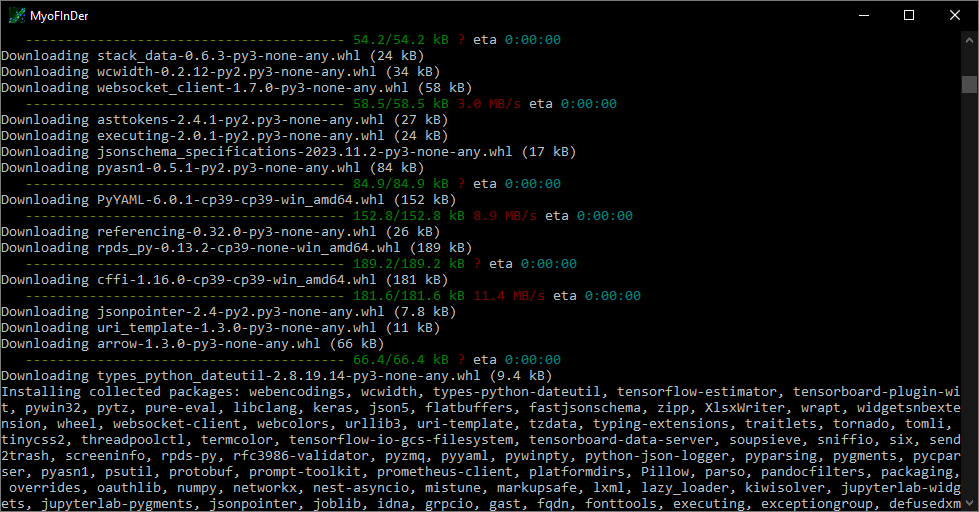
Once MyoFInDer is running, a console should first appear with log messages displaying in it. If started from the command-line, this console is already open and is the one you typed your commands in. This console simply displays the log messages, which may be useful for tracking errors. The first time you start MyoFInDer, many messages will be prompted in the console ! That is because MyoFInDer needs to finish its installation, and will download a number of dependencies. This step can take up to several minutes, depending on the speed of your internet connection and on the performance of your computer. The displayed messages should look similar to:
Shortly after the console, a Splash window should also appear while the module is loading. It can take up to 30s for the application to open, and even more on the first run as it has to download some data. The Splash window should look as such :

2. Basic usage
2.1 Loading images
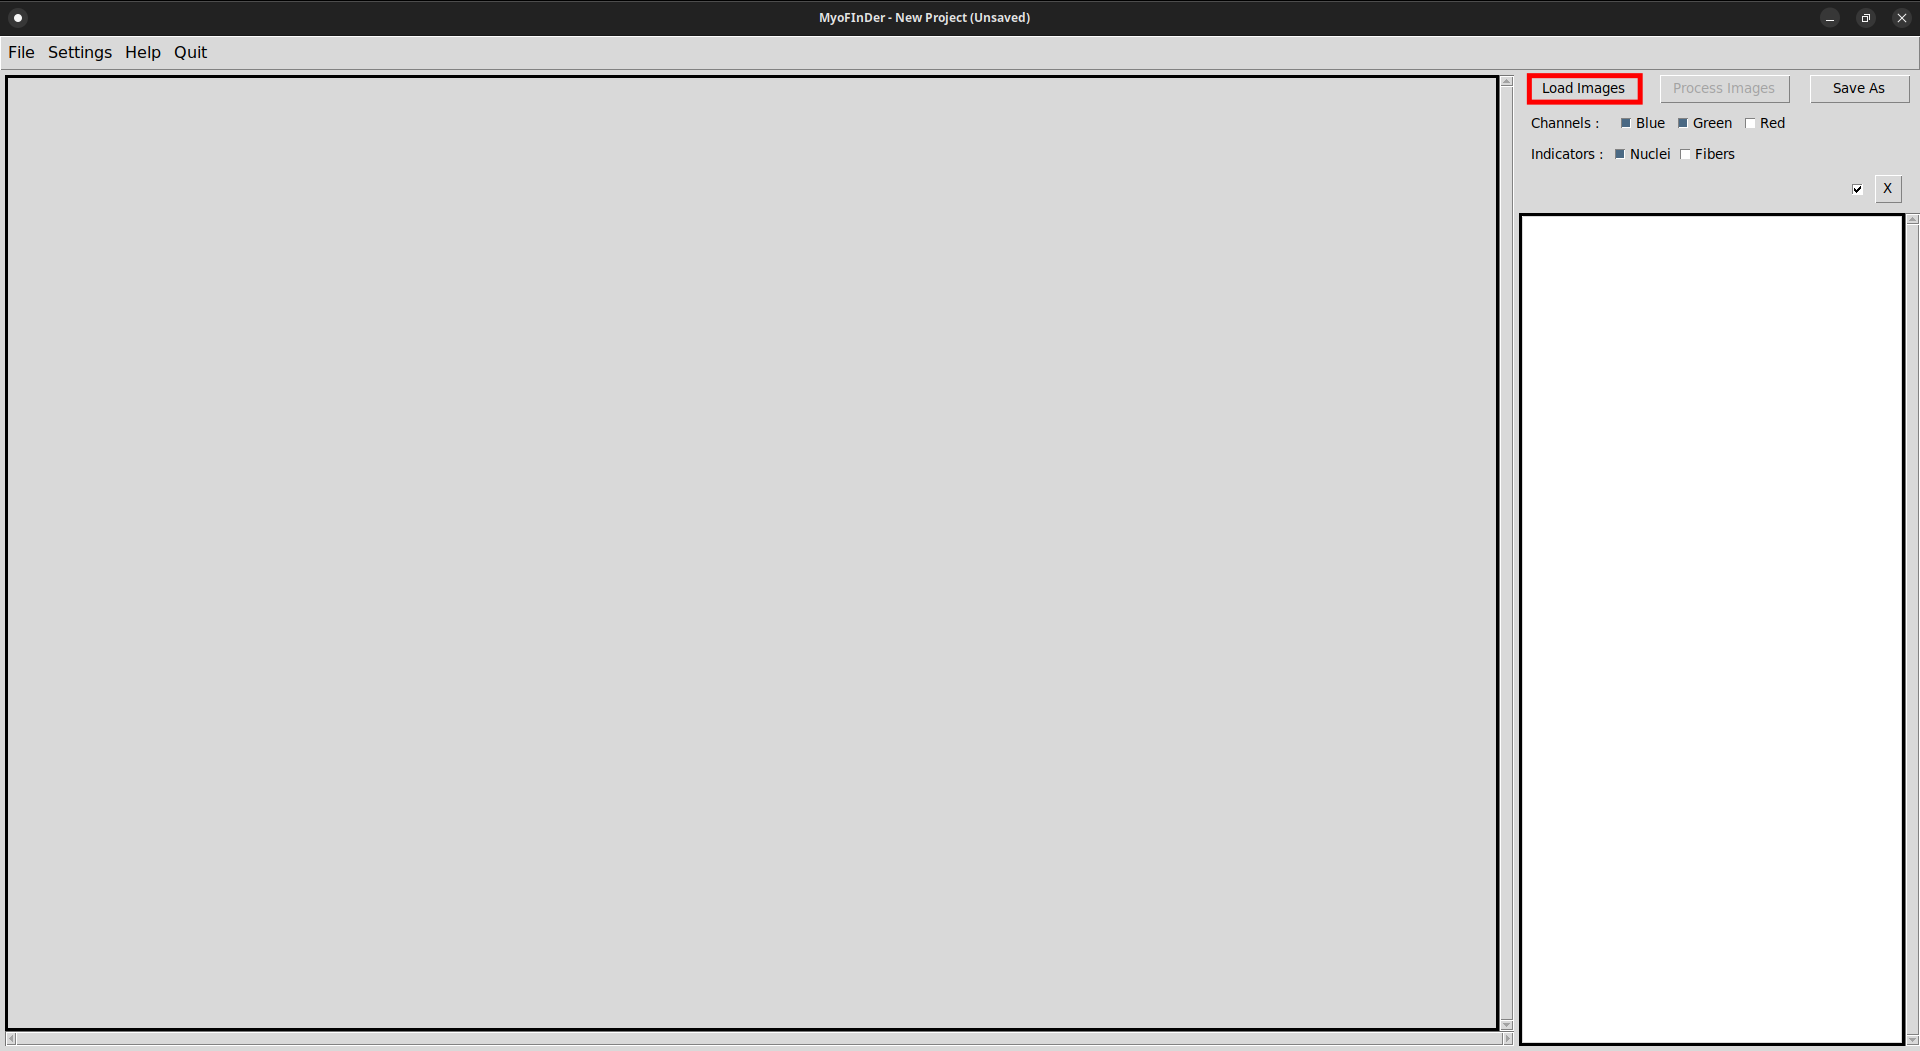
The first step for processing images is to load them in the interface. To do so, click on the Load Images button located at the top-right of the interface.
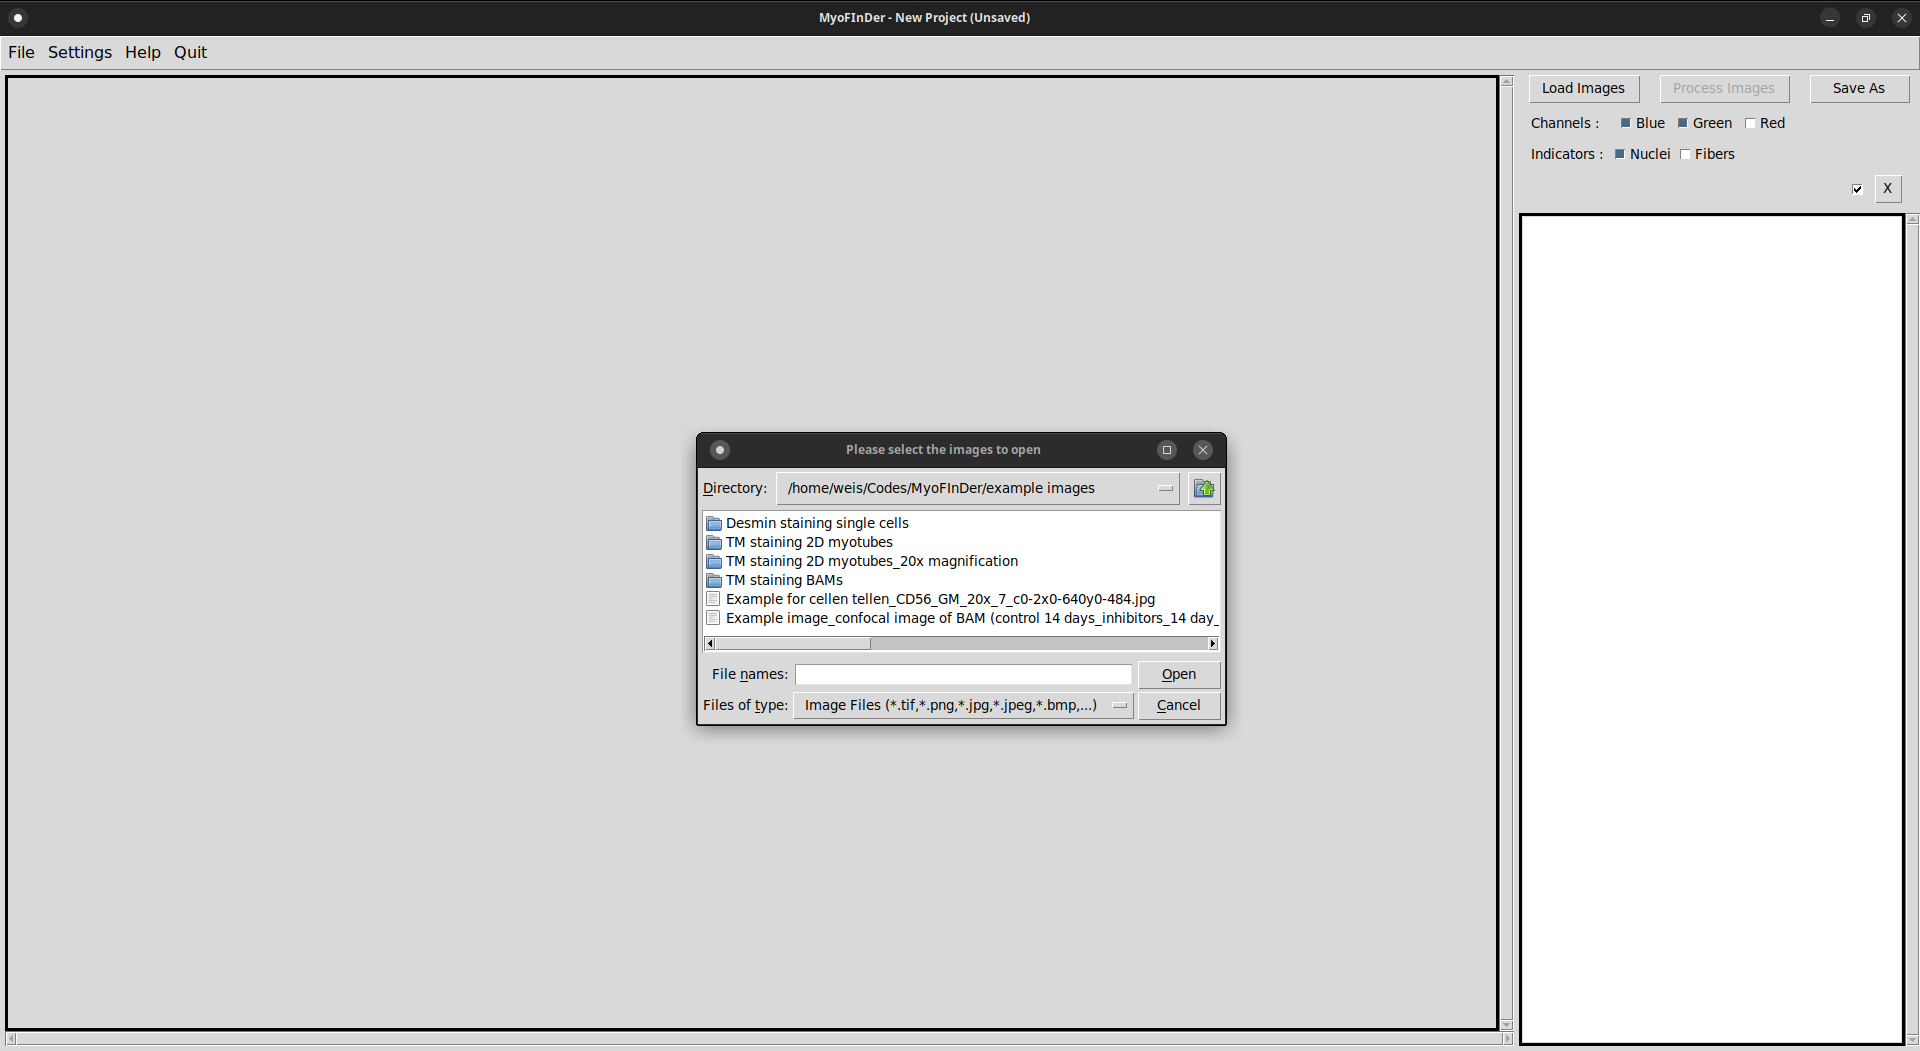
A file explorer then appears, in which you can browse the files in your computer and in the network drives. In this explorer, select one or several images to import and click on Open.
Information on the imported images is then displayed in the information frame on the right of the interface. In the main frame, the currently selected image is displayed. You can select another image by left-clicking on it in the information frame.
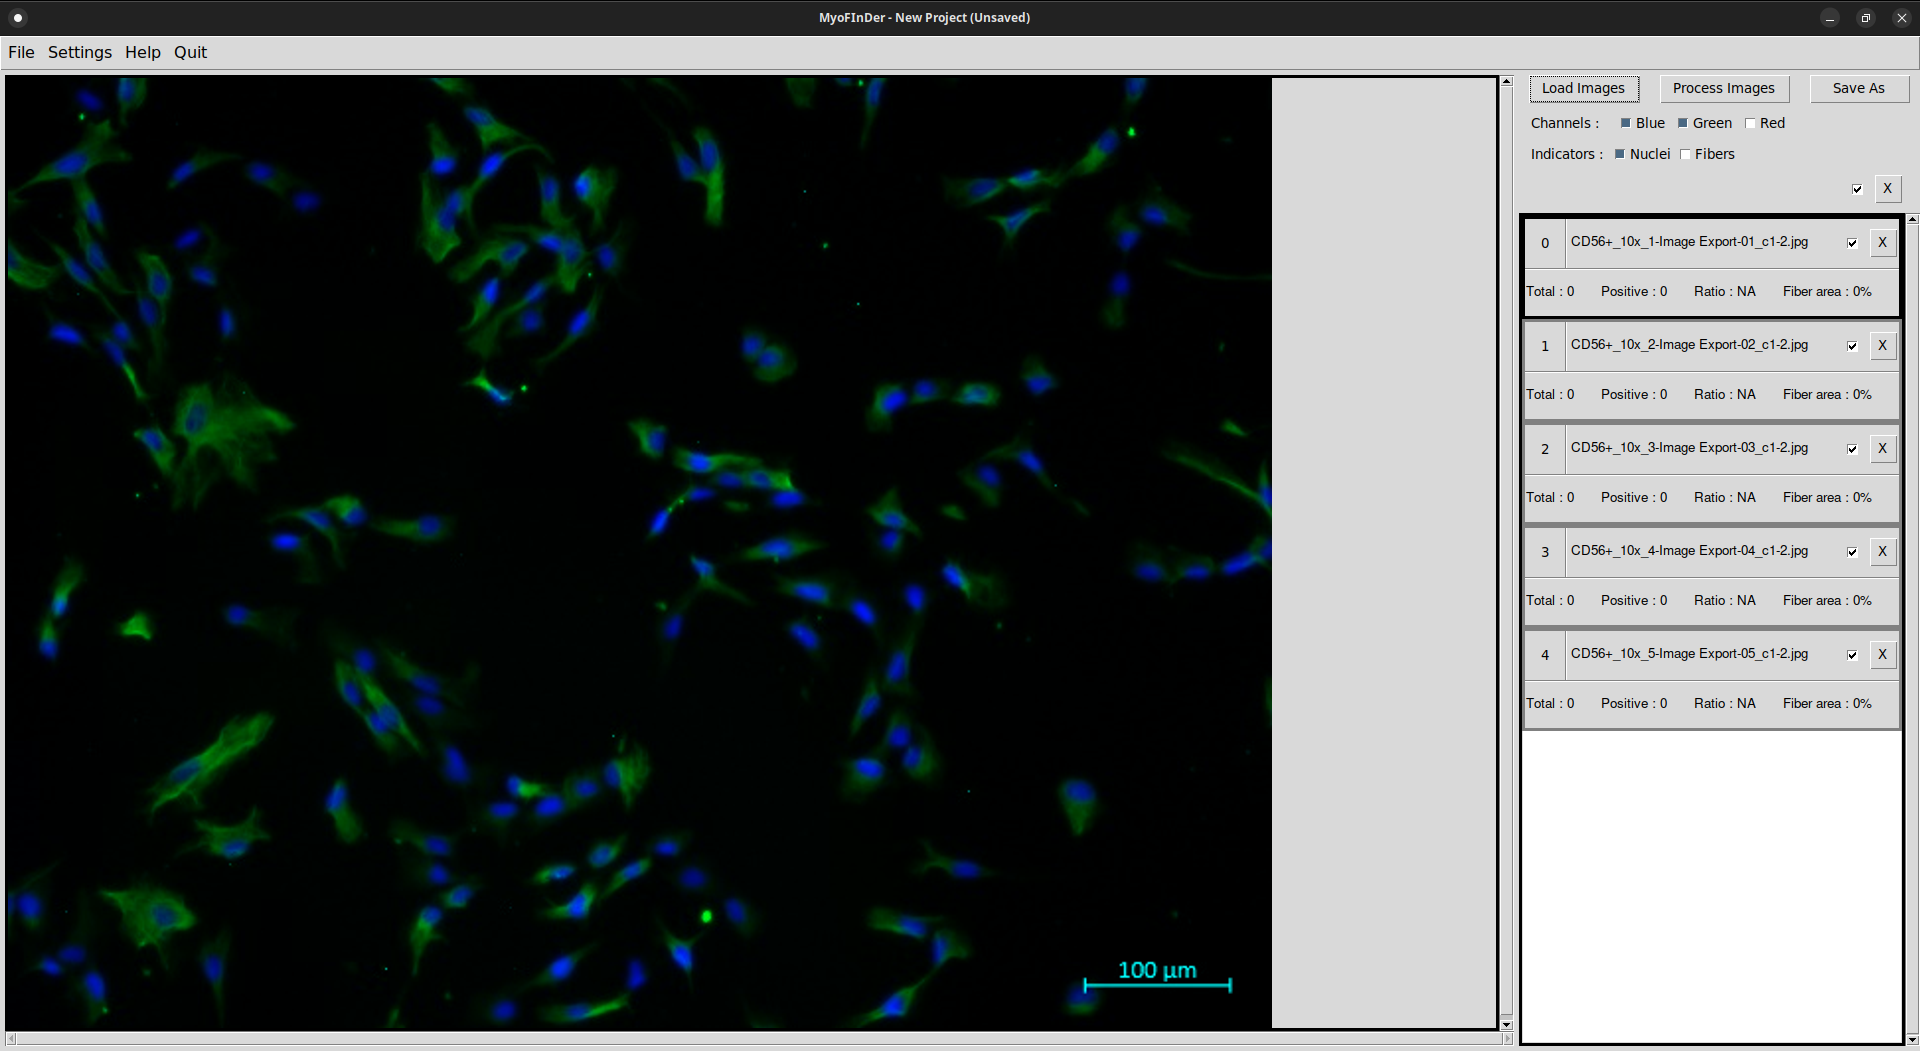
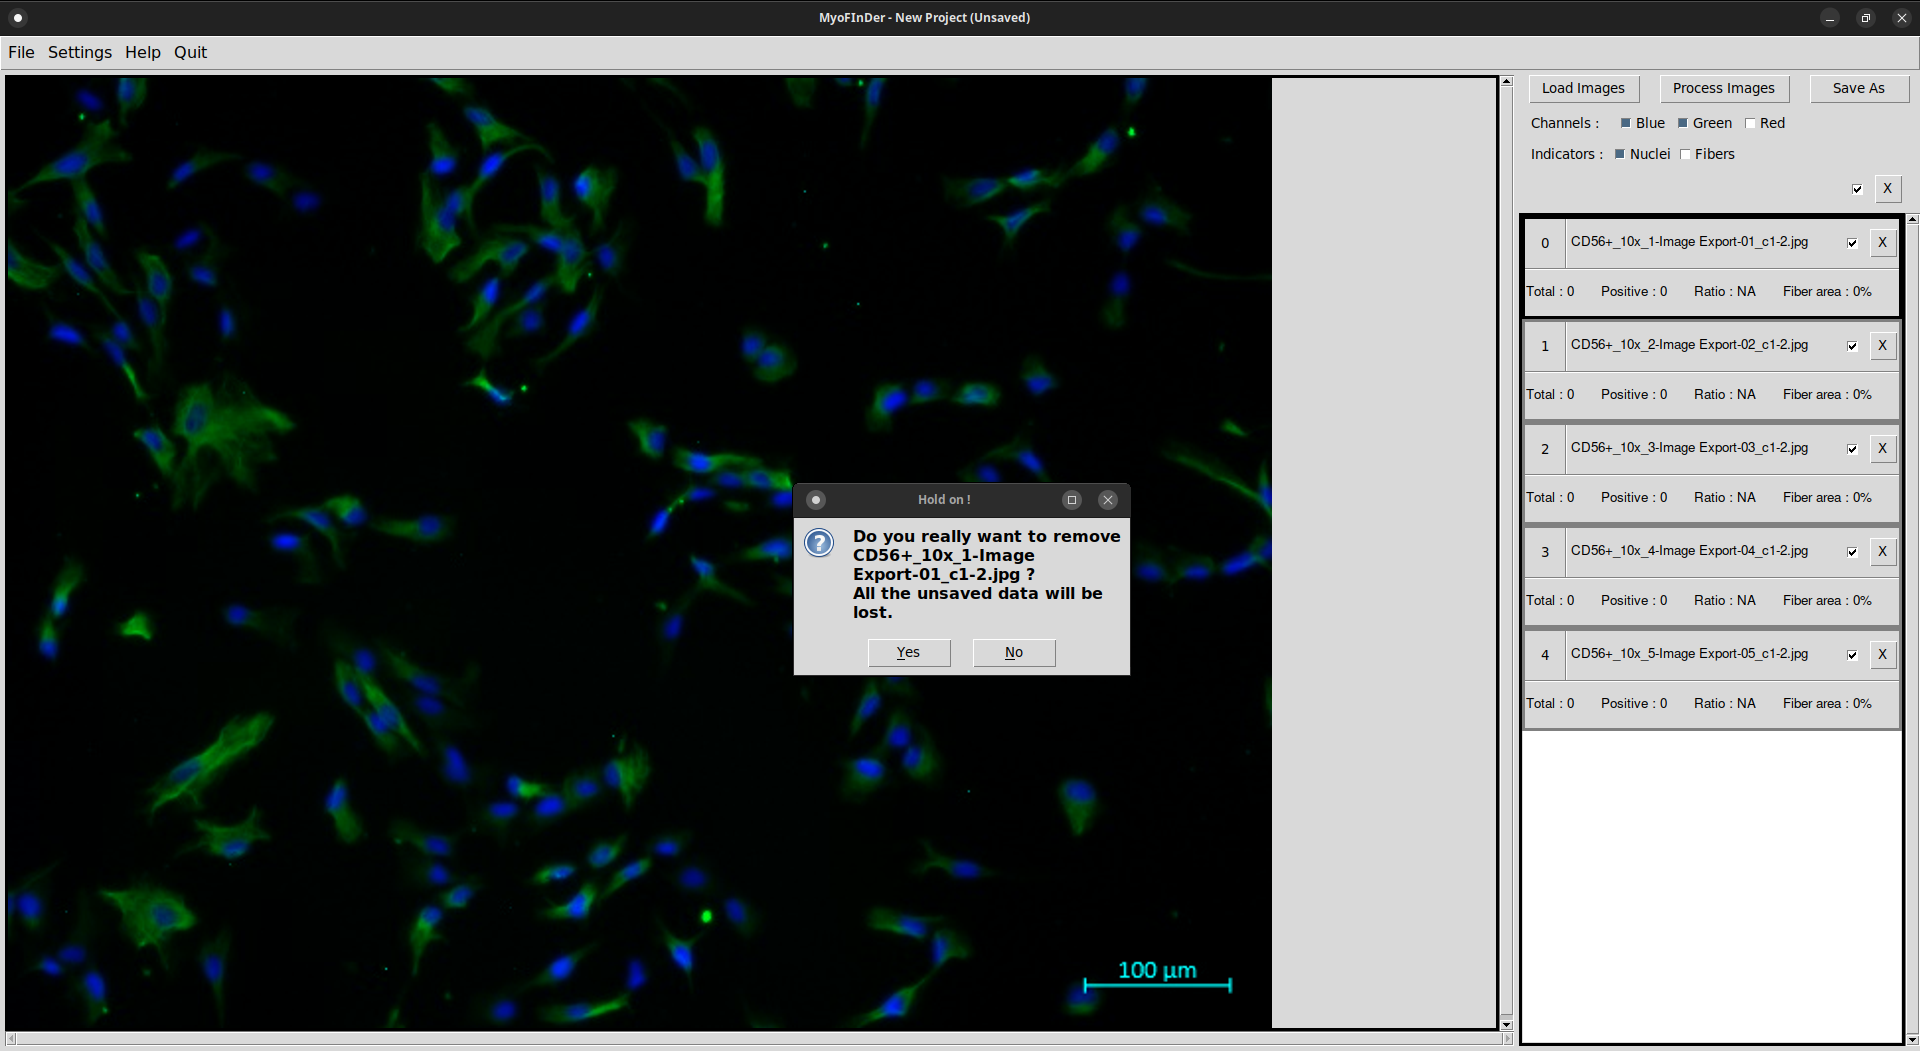
It is also possible to delete a loaded image by clicking on the X Delete button at the top-right of its information display. You will be asked to confirm your choice in a popup window.
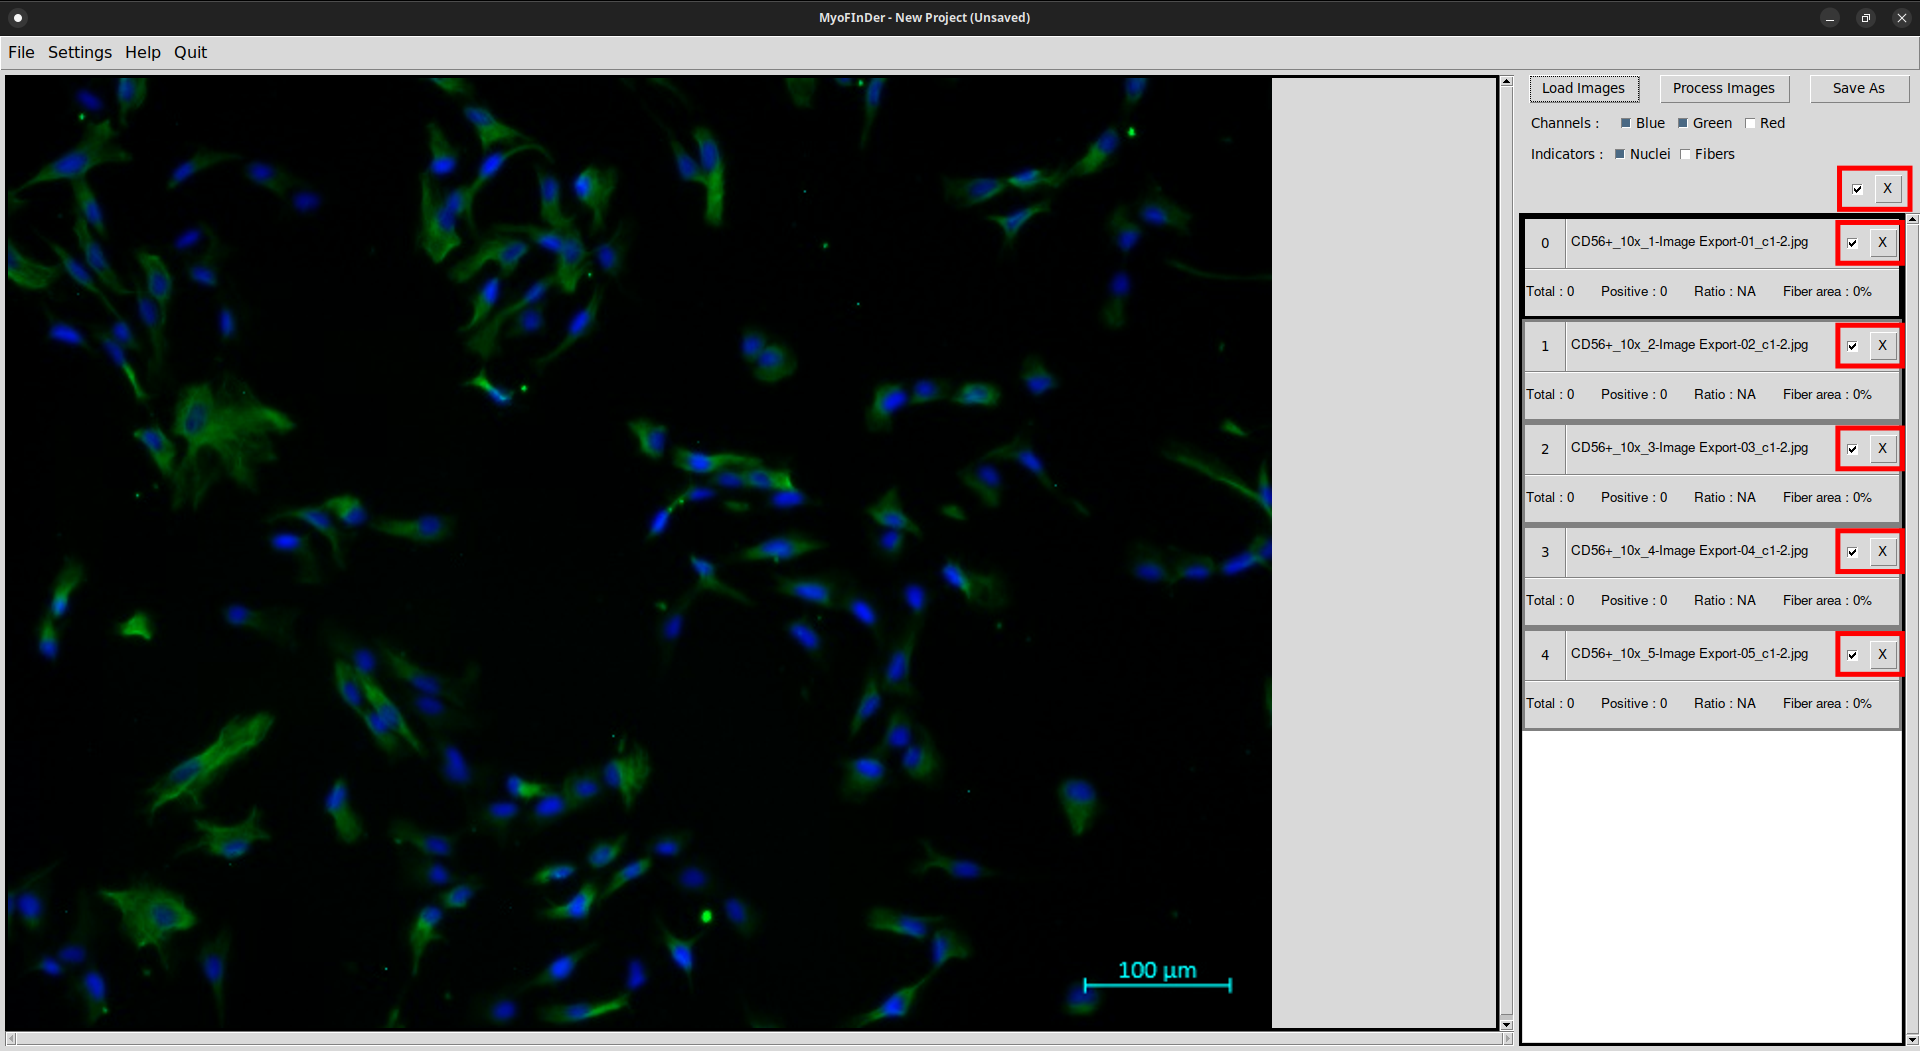
The checkboxes of the images allow to apply the Delete and Process operations to only part of the loaded images. The deletion of all the checked images is achieved by using the master Delete button. The master checkbox allows to (un)select all the images at once.
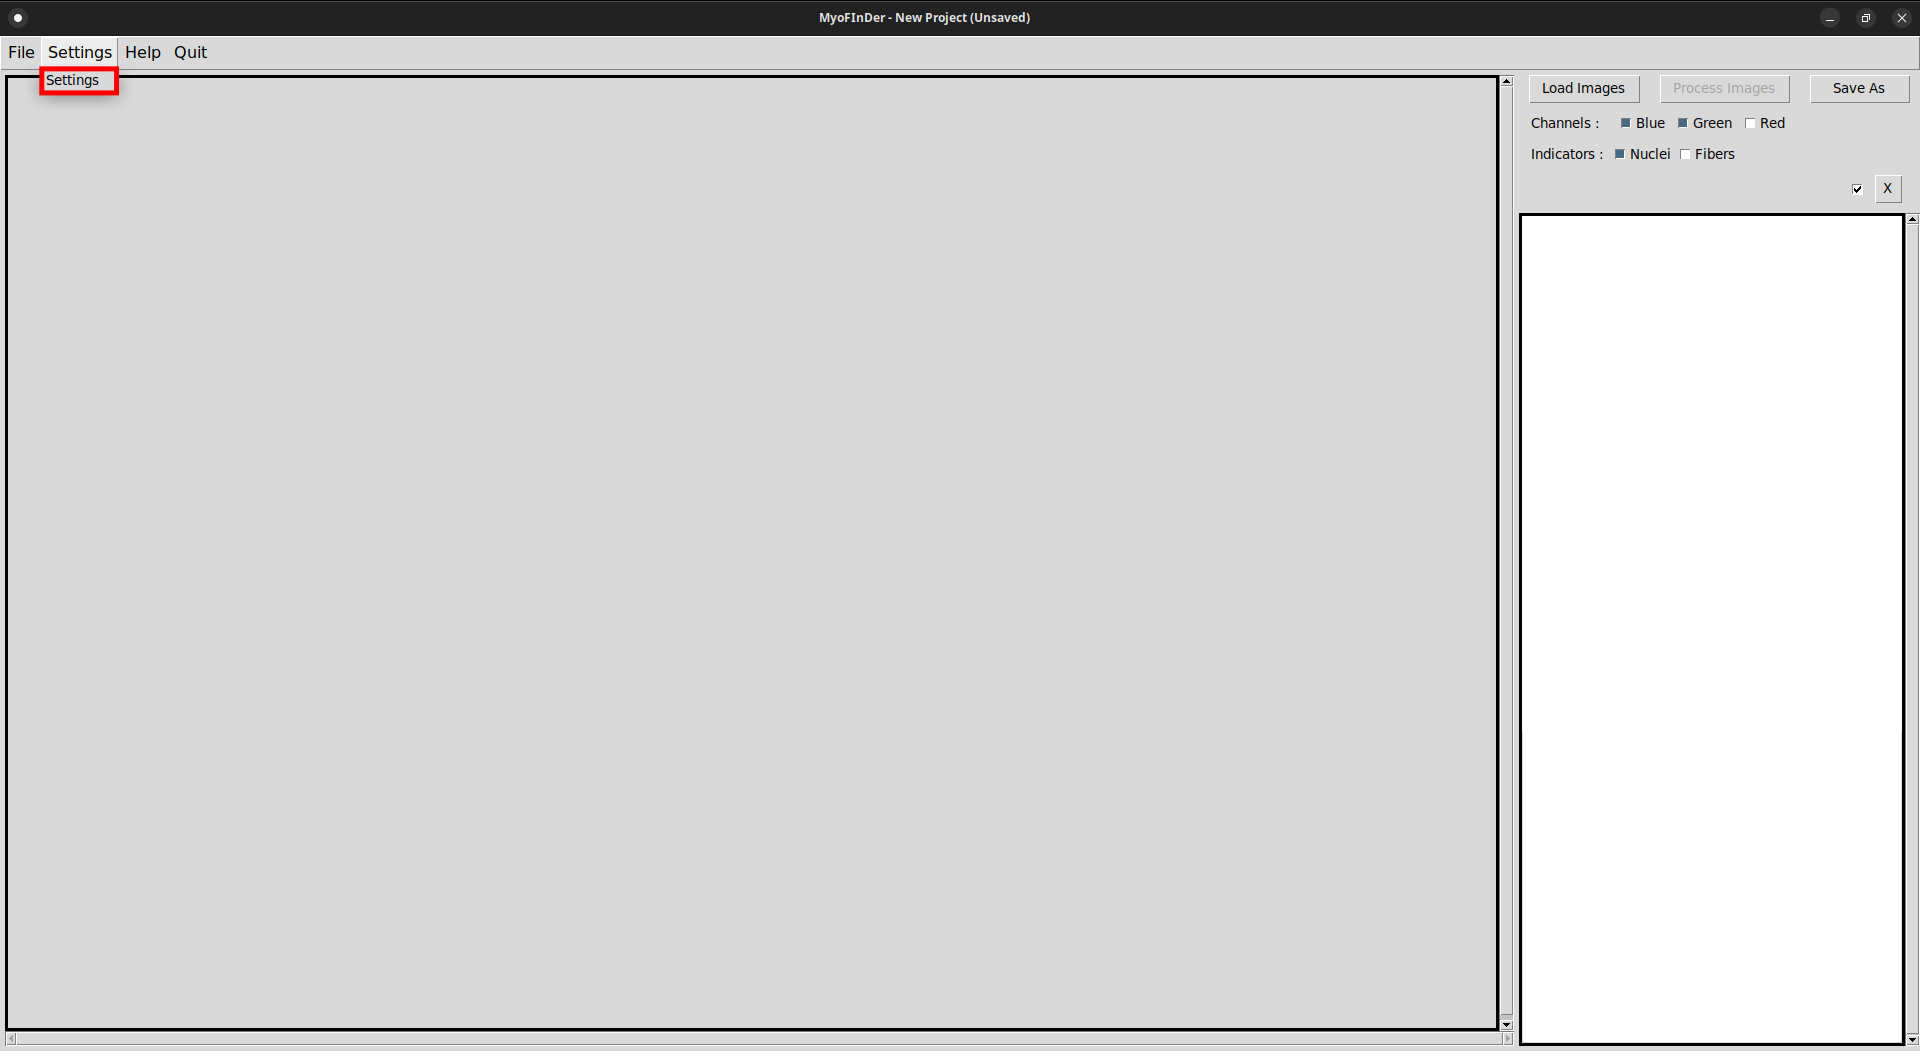
2.2 Tuning the settings
Before processing the loaded images, you might want to adjust the processing parameters. This can be done by clicking on the Settings button, that opens a new window containing the Settings menu.
In this menu, you can adjust various parameters like the channels to use for the fibers and nuclei or thresholds to use when processing images. The settings are applied as soon as you modify them, there is no need to validate your choice. Just close this window when you’re done.
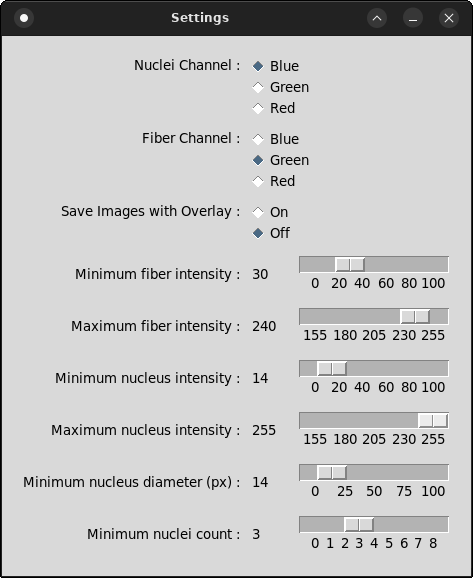
The available settings are:
- Nuclei Channel: The color channel of the image carrying the signal for the nuclei. Default to Blue.
- Fiber Channel: The color channel of the image carrying the signal for the fibers. Default to Green.
- Save Images with Overlay: When saving a project, the raw images are always saved. In addition, it is possible to save the images with the detected nuclei and fibers drawn on top as an overlay, if this option is set to On. Defaults to Off.
- Minimum fiber intensity: For each channel, the color intensity of each pixel is represented by a value between 0 and 255. Pixels of the Fiber Channel whose intensity is lower than the value of this setting are not considered as part of the detected fibers. Defaults to 25.
- Maximum fiber intensity: For each channel, the color intensity of each pixel is represented by a value between 0 and 255. Pixels of the Fiber Channel whose intensity is greater than the value of this setting are not considered as part of the detected fibers. Defaults to 255.
- Minimum nucleus intensity: For each channel, the color intensity of each pixel is represented by a value between 0 and 255. Only nuclei whose average intensity is greater than the value of this setting will be detected. Defaults to 25.
- Maximum nucleus intensity: For each channel, the color intensity of each pixel is represented by a value between 0 and 255. Only nuclei whose average intensity is lower than the value of this setting will be detected. Defaults to 255.
- Minimum nucleus diameter (px): The minimum “average” diameter a nucleus must have in order to be detected, in pixels. More precisely, the area of detected nuclei must be superior or equal to the area of a circle whose diameter is the value of this setting. Defaults to 20.
- Minimum nuclei count: If a fiber does not contain at least this number of nuclei, then all its positive nuclei will be counted as negative. This prevents nuclei in unfused myoblasts to be counted as positive for the fusion index calculation. Defaults to 3.
2.3 Starting a computation
Once you have adjusted the computation parameters, it is time to start processing images. To do so, simply click on the Process Images button.
If you use images from a network drive, is advised to first save the project locally before processing them. This way, MyoFInDer won’t be affected by potential network issues.
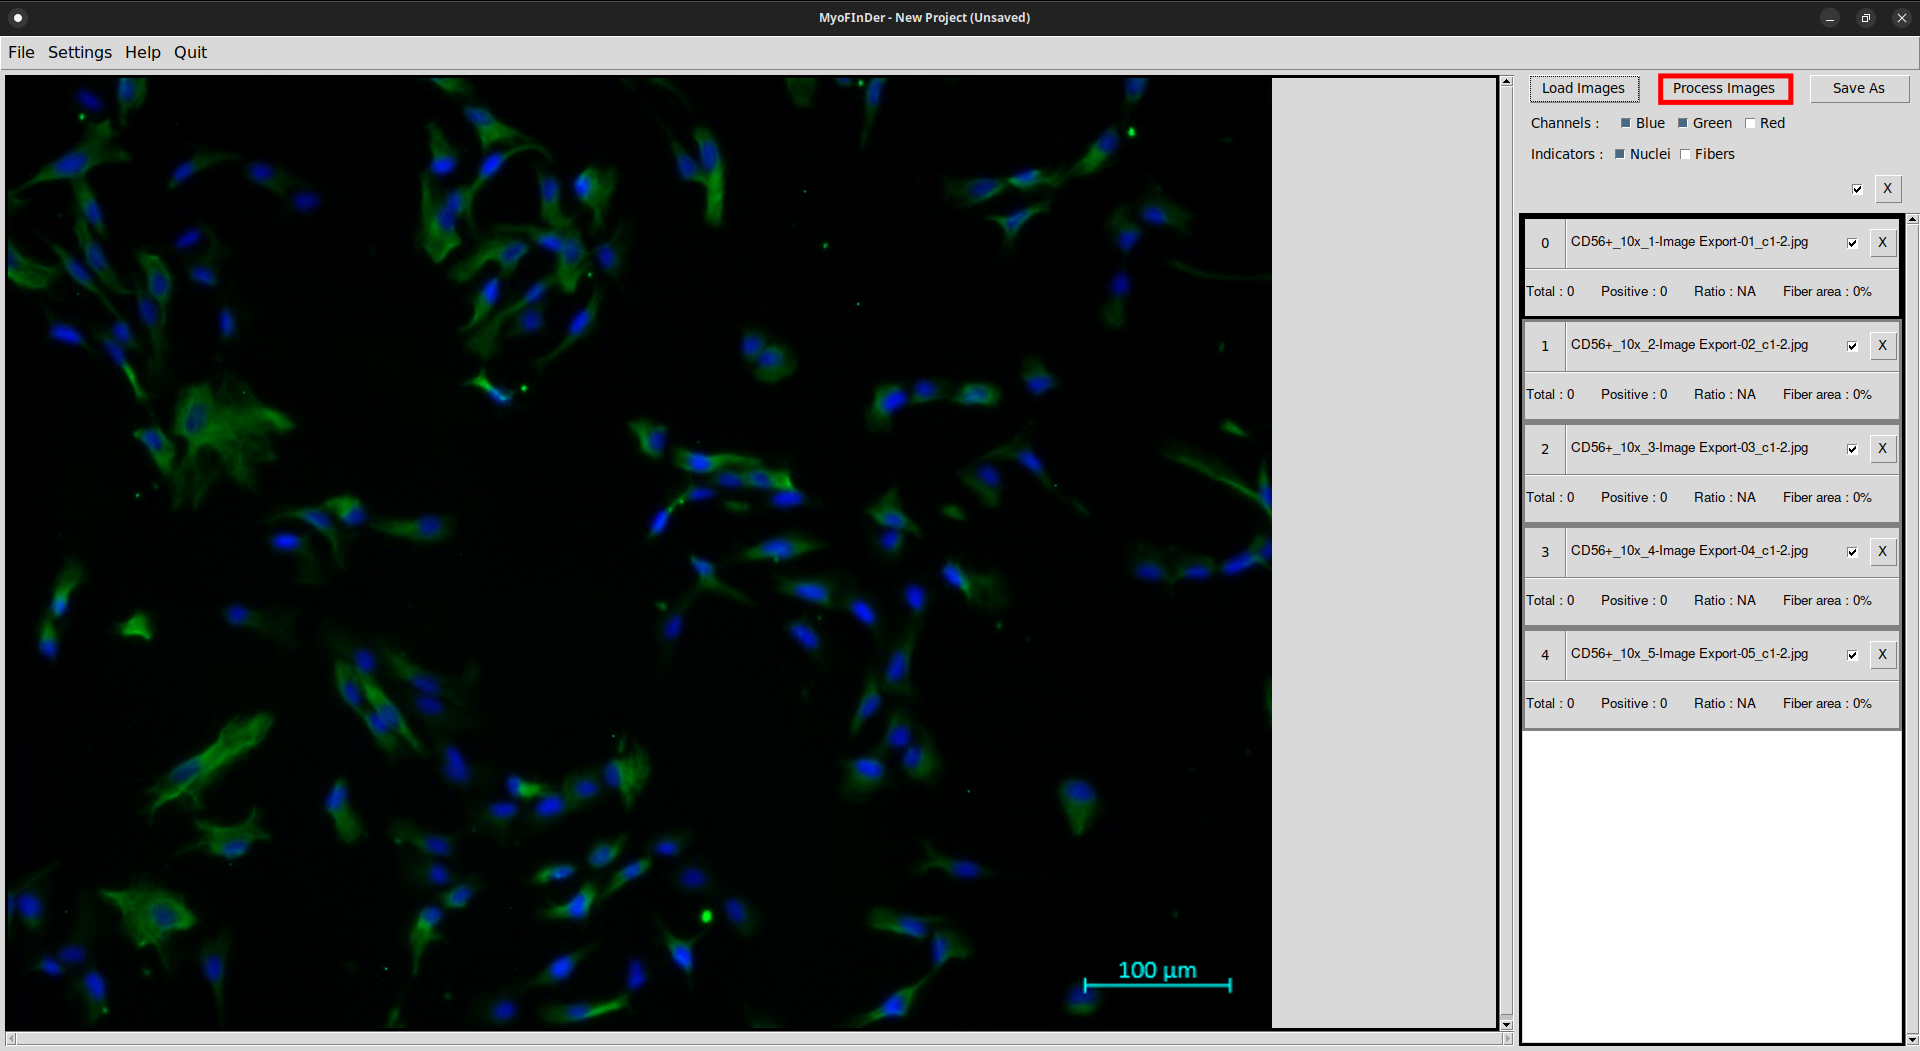
All the checked images then start being processed, and a message displays the progress status. The images are processed one by one, in the same order as they appear in the information frame.
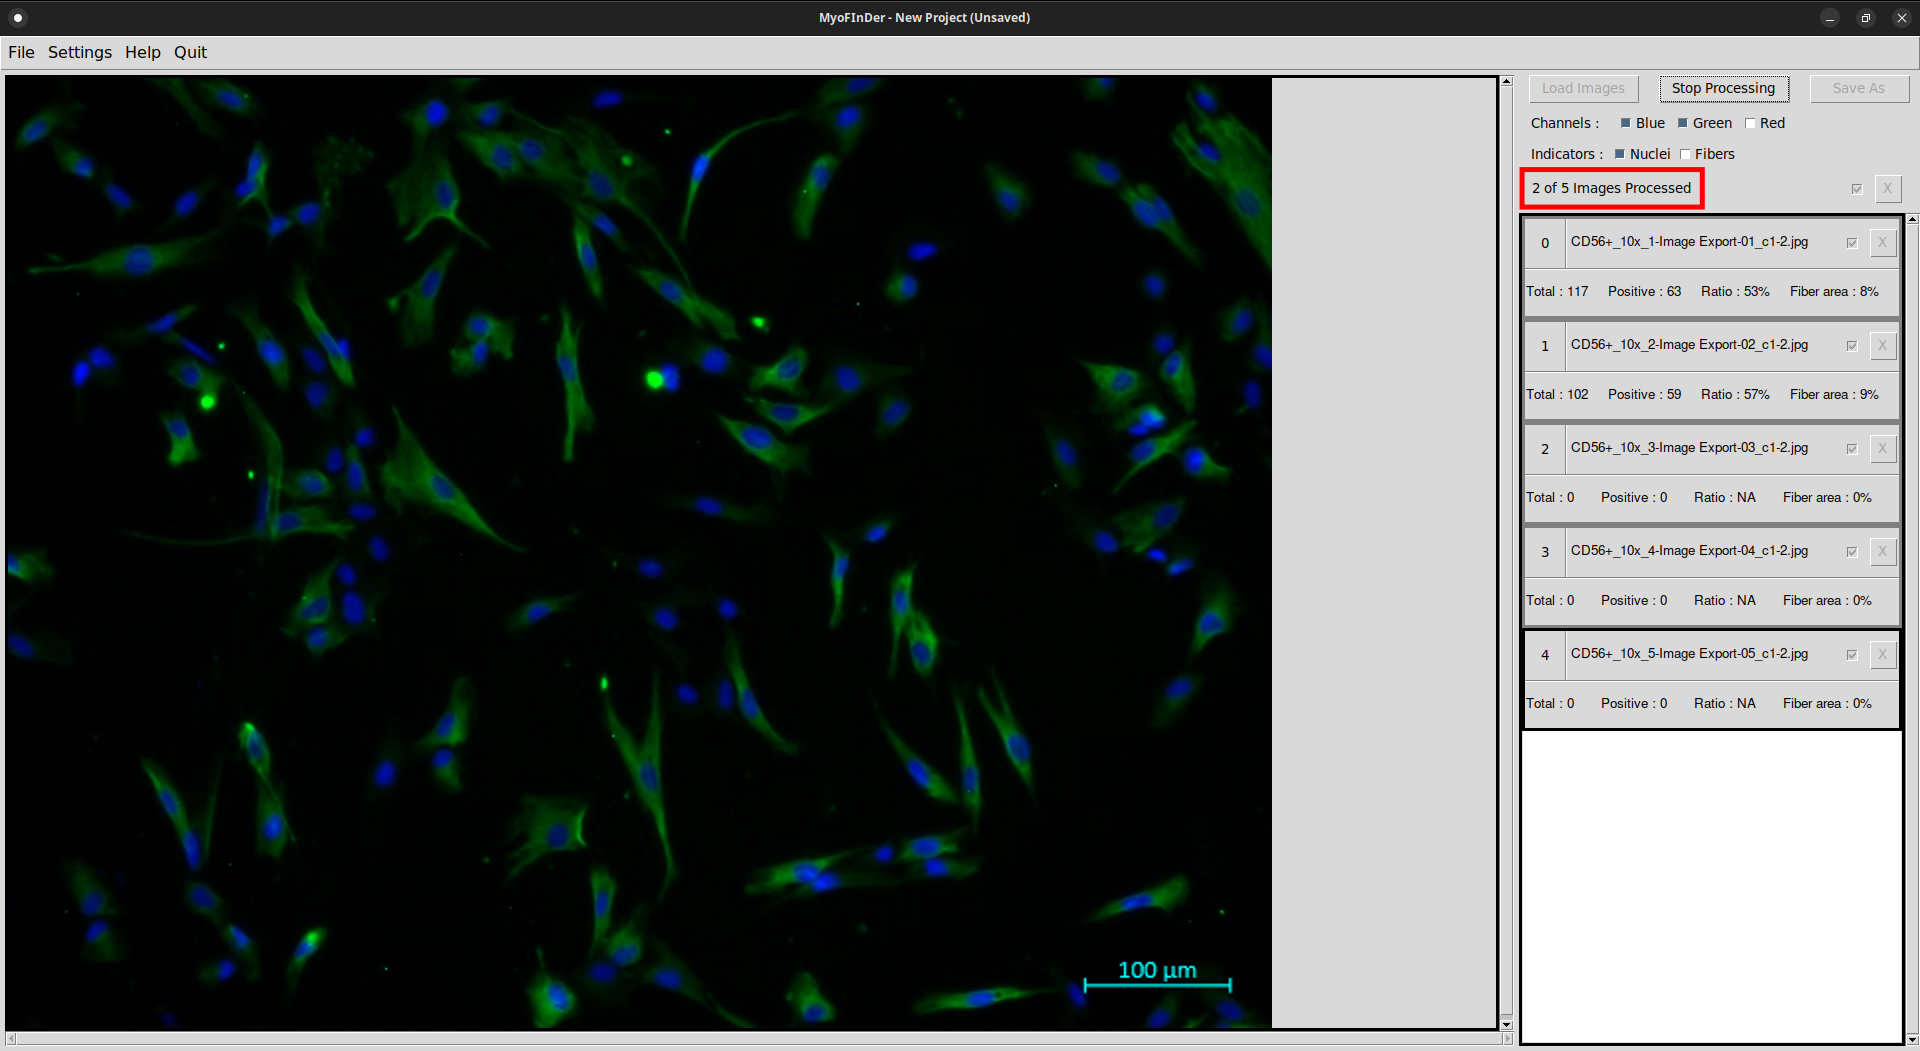
On each processed image the nuclei and fibers are detected, and the information on the right frame is updated accordingly.
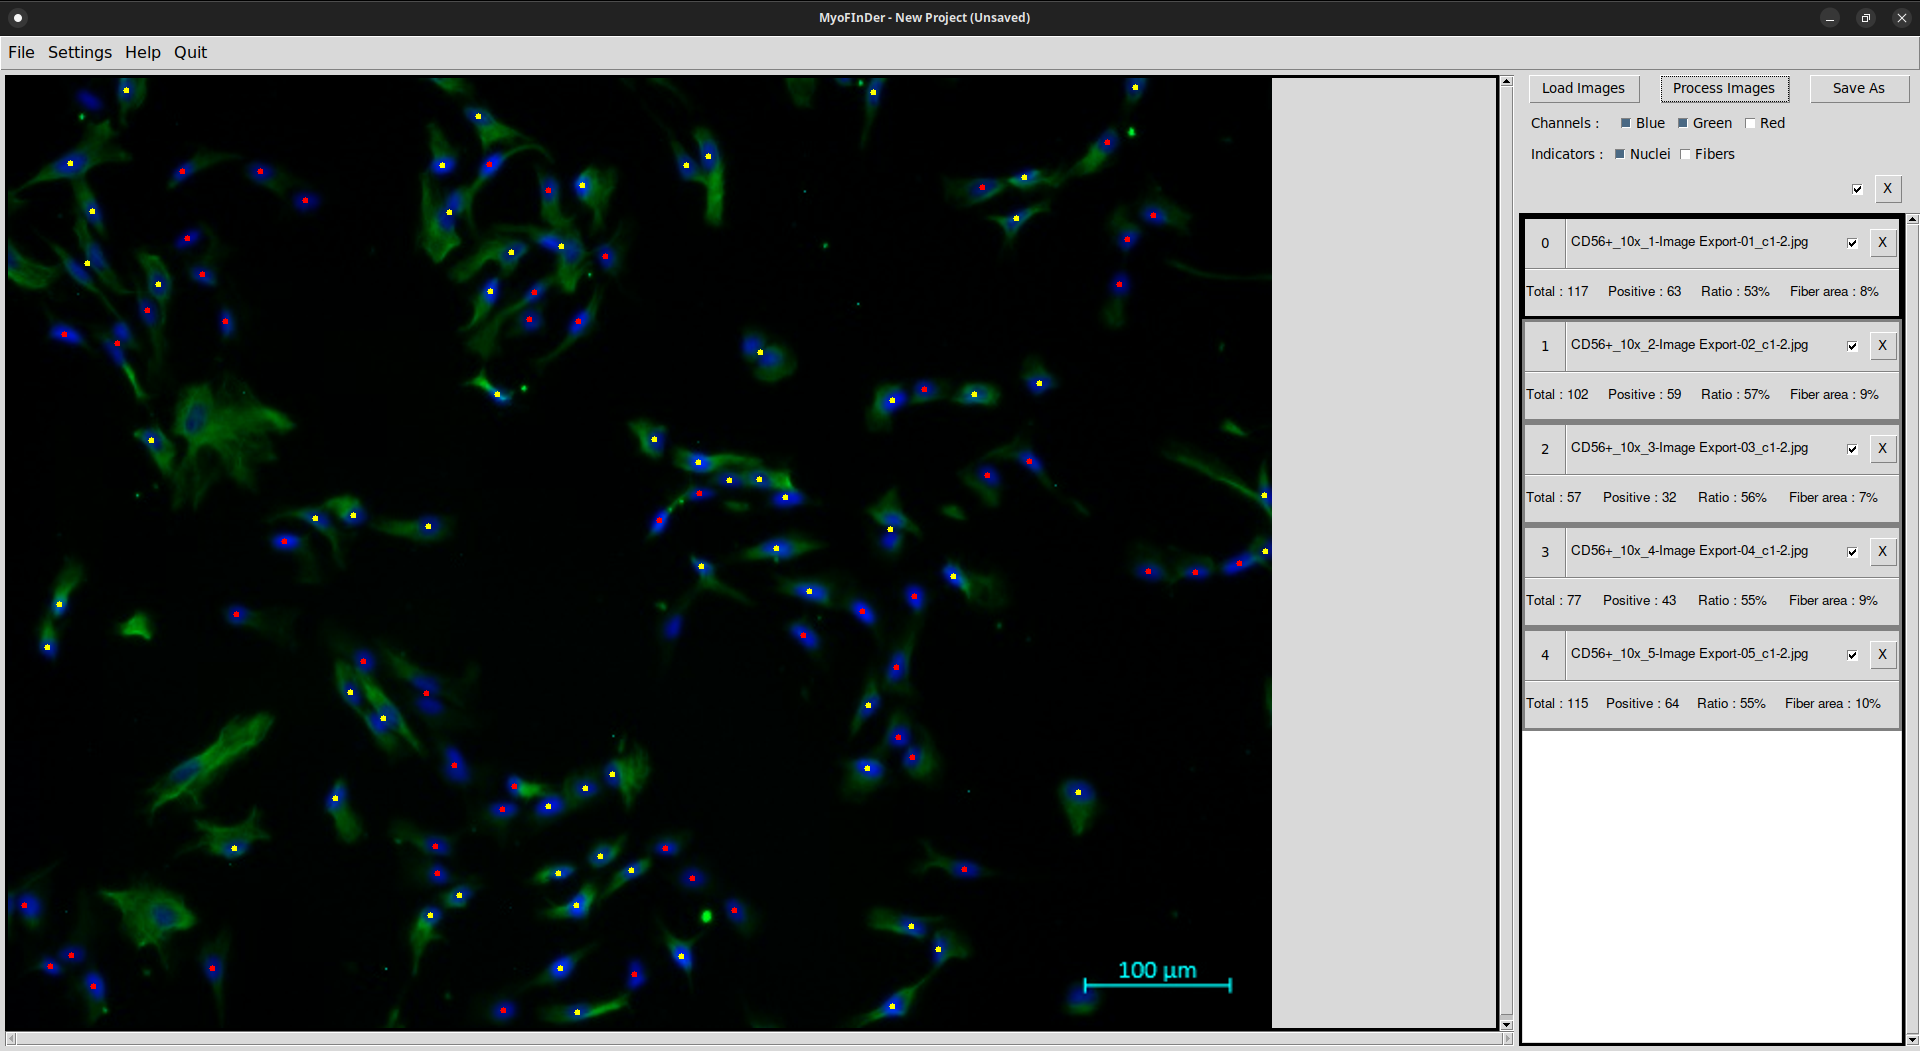
The display for the selected image in the main frame might also be updated, depending on the selected display options. The positive and negative nuclei are displayed in different colors, and these color vary depending on the channels carrying the nuclei and fiber information.
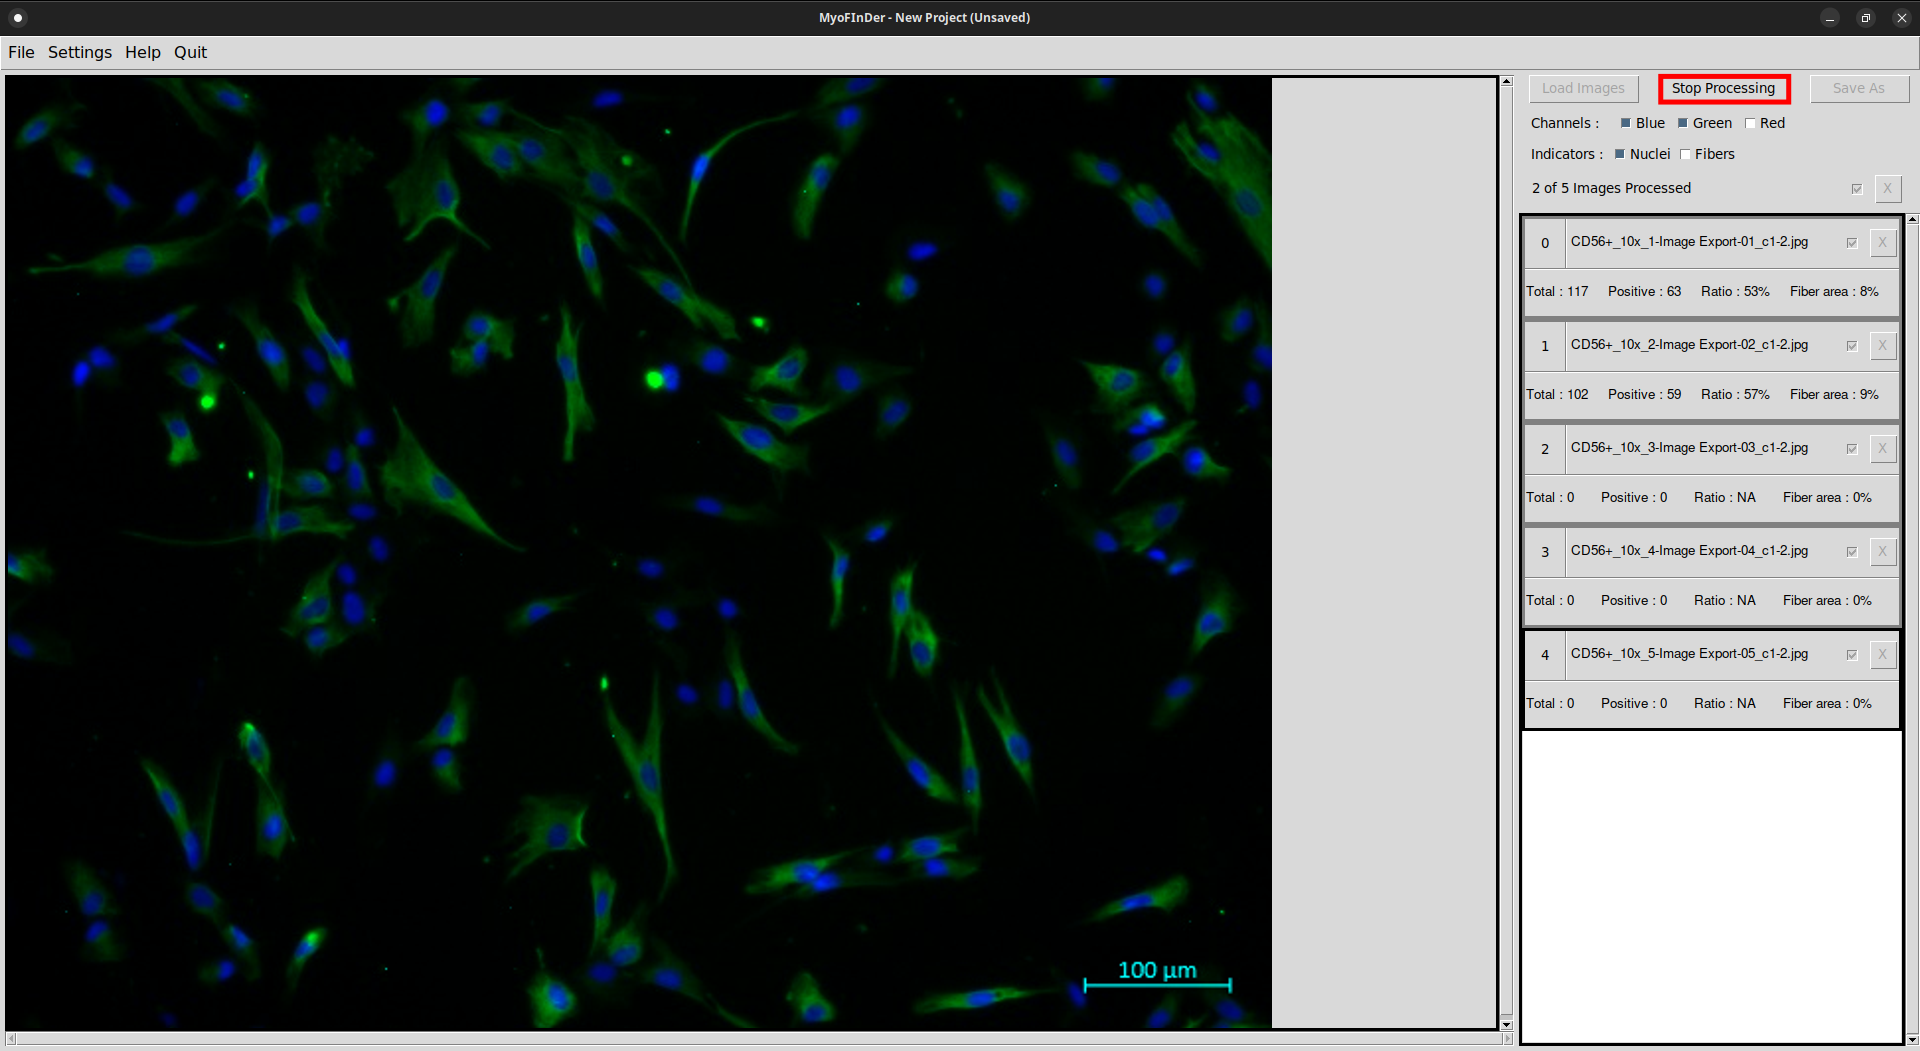
It is possible to stop the computation while it is running by clicking on the Stop Processing button. It might take a few seconds for the computation to effectively stop.
2.4 Adjusting the display
At the top-right of the interface, several checkboxes allow to tune the display of the currently selected image in the main frame. It is possible to choose which channels are displayed, and if the nuclei and fibers overlay are added.
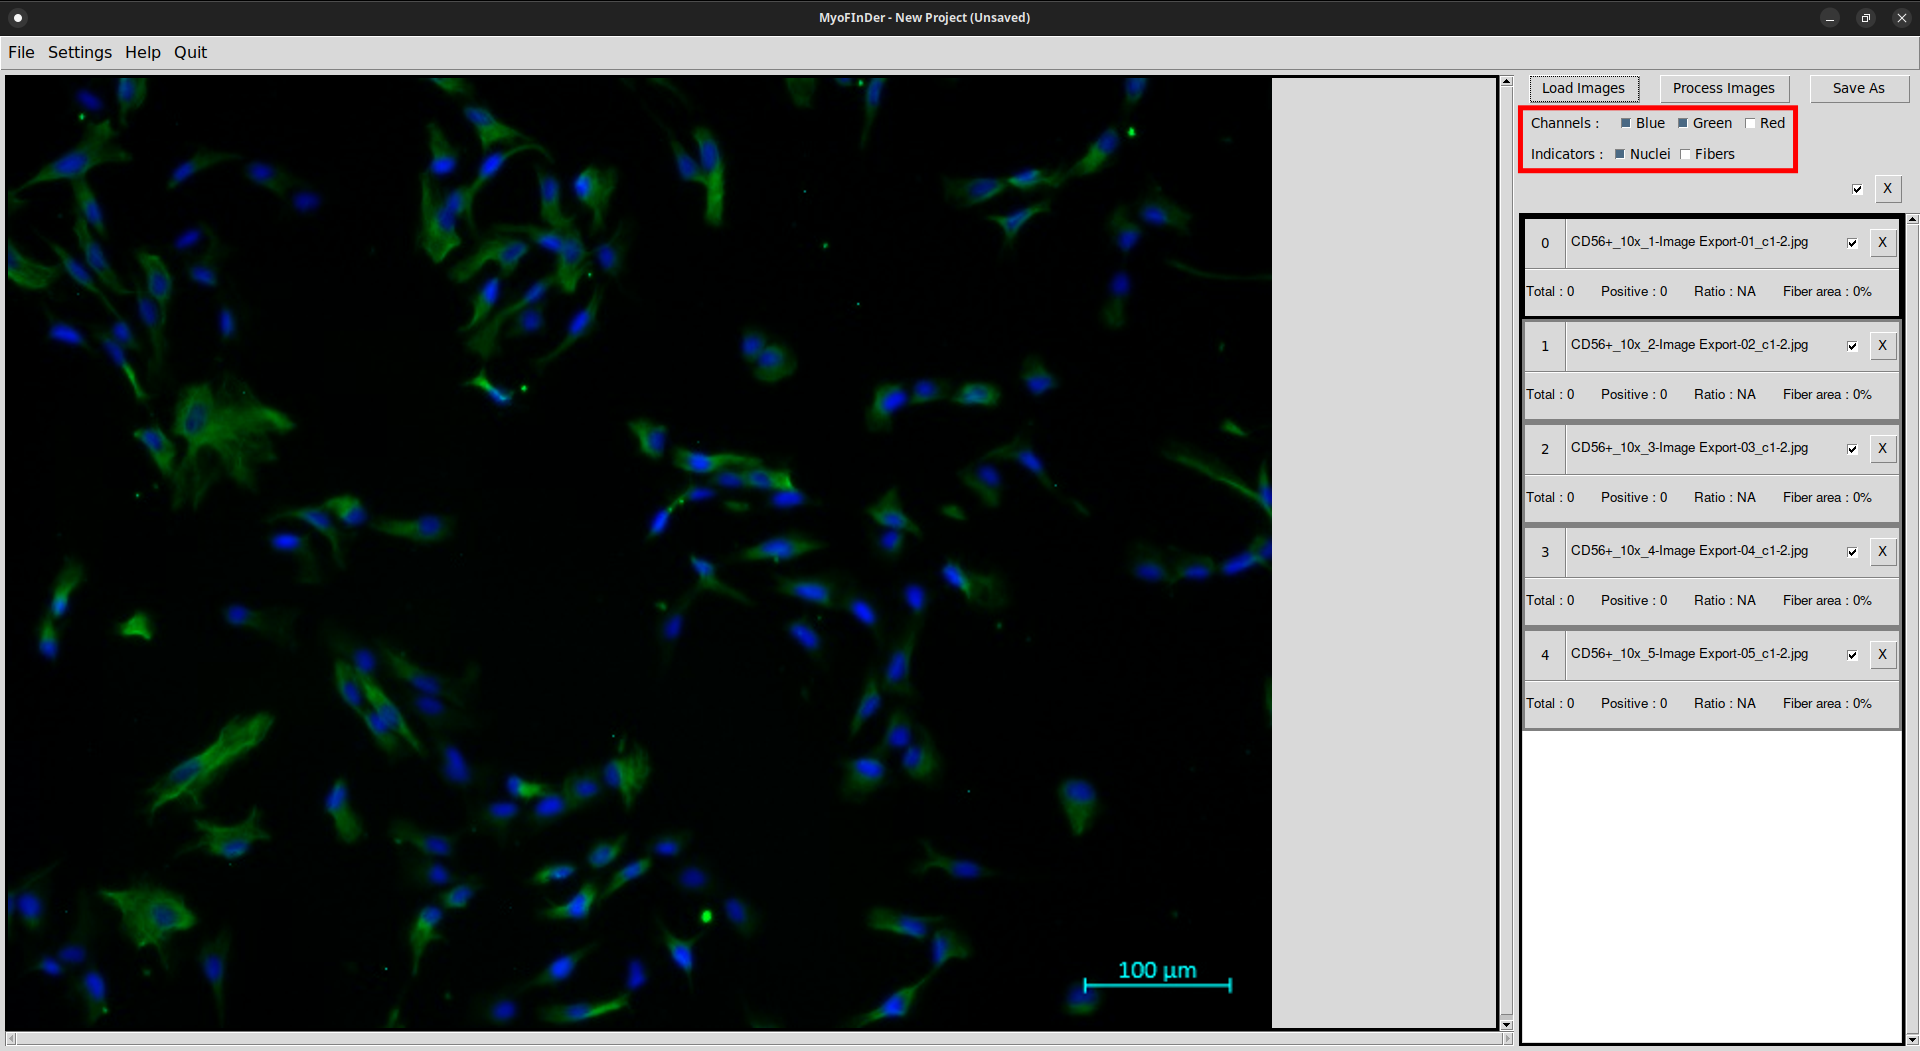
Using the mouse scroll wheel, you can zoom in and out on the displayed image. The -, _, + and = keys also allow zooming in and out. Click on the mouse wheel and drag to move the view on a zoomed image.
2.5 Manually correcting the output
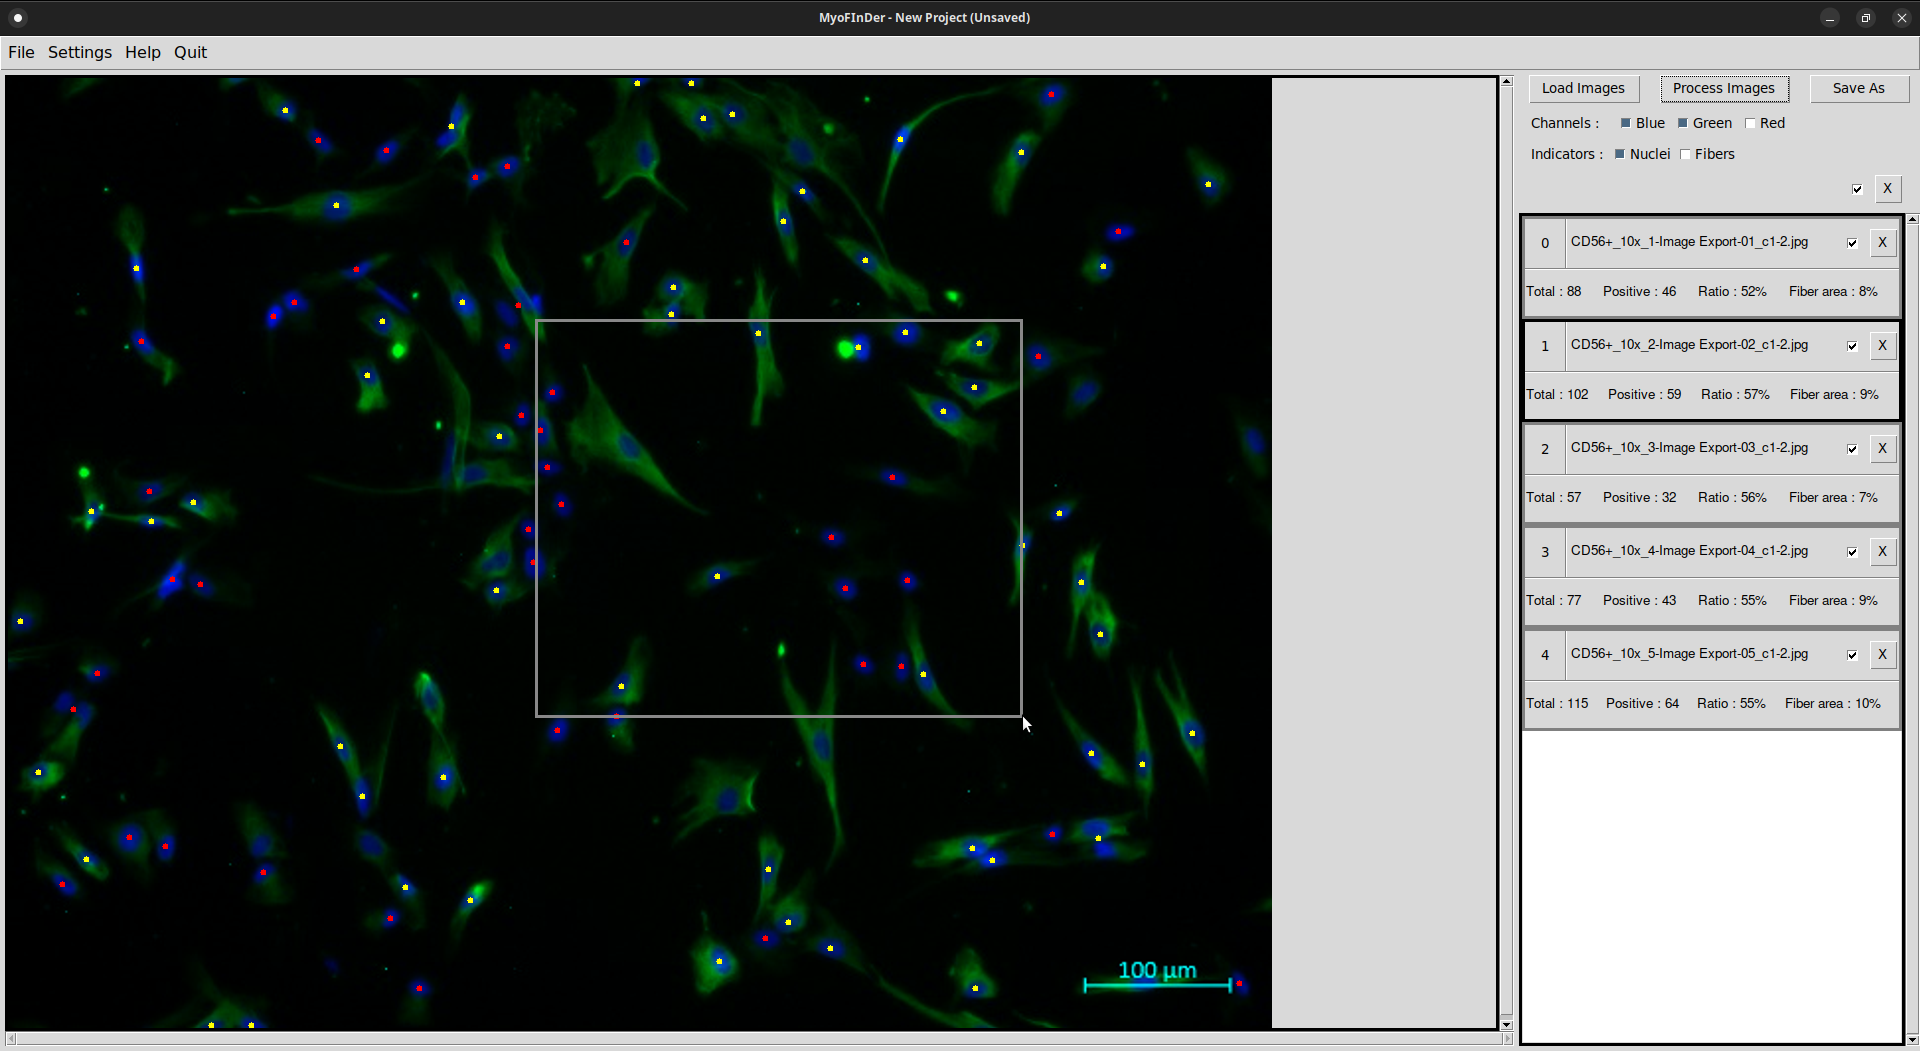
Once the images have been processed, you can manually correct the output by adding, inverting or deleting nuclei. To do so, the nuclei overlay must be enabled. To add a nucleus, left-click on an area where no nucleus is present. To invert a nucleus, i.e. switch it from positive to negative or vice-versa, left-click on an already existing one. And to delete a nucleus, right-click on an already existing one.
It is also possible to invert or delete multiple nuclei at once. To do so, left- or right-click and drag to form a selection box. All the nuclei inside the selection box are inverted or deleted, depending on the side of the click.
3. Managing your projects
3.1 Saving your data into a project
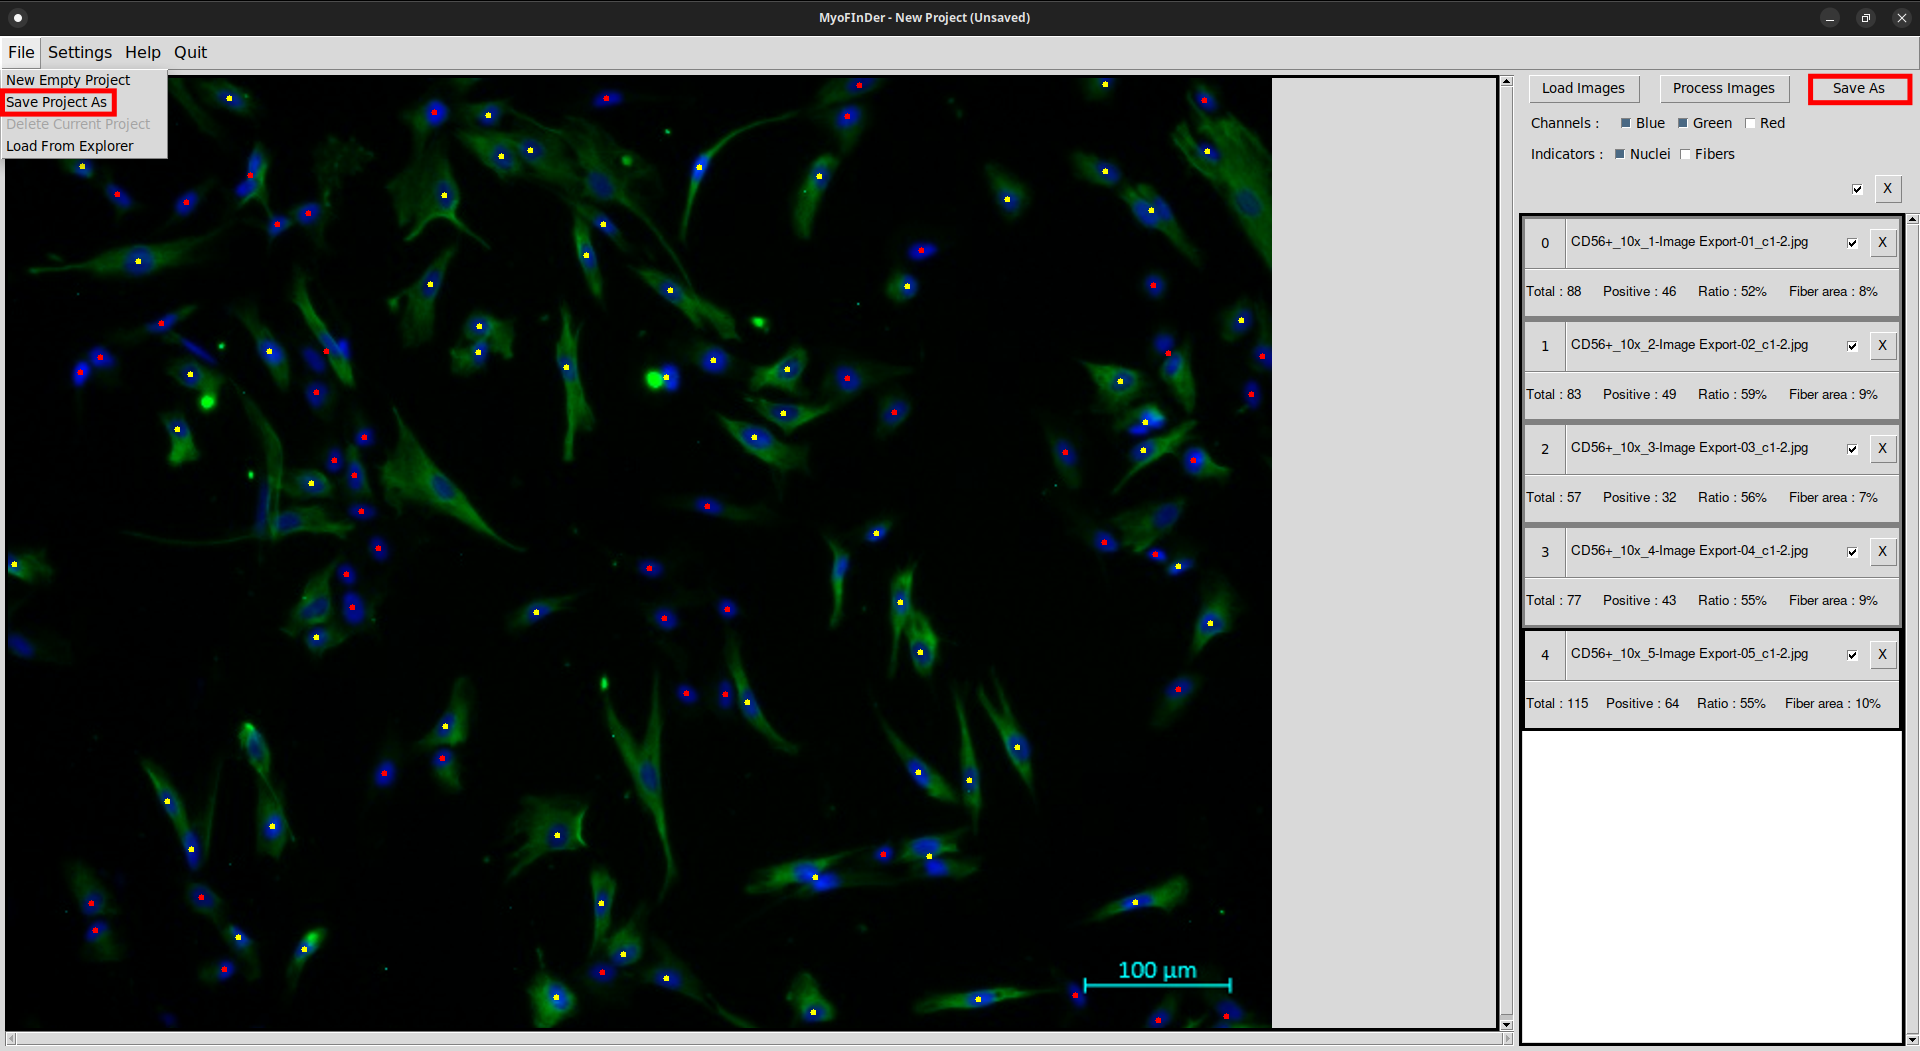
In MyoFInDer the data is saved as a project, which means that the data for all the loaded images is saved at once. To save a project, simply click on the Save As button at the top-right of the interface. Alternatively, you can also click on the Save Project As button in the File menu.
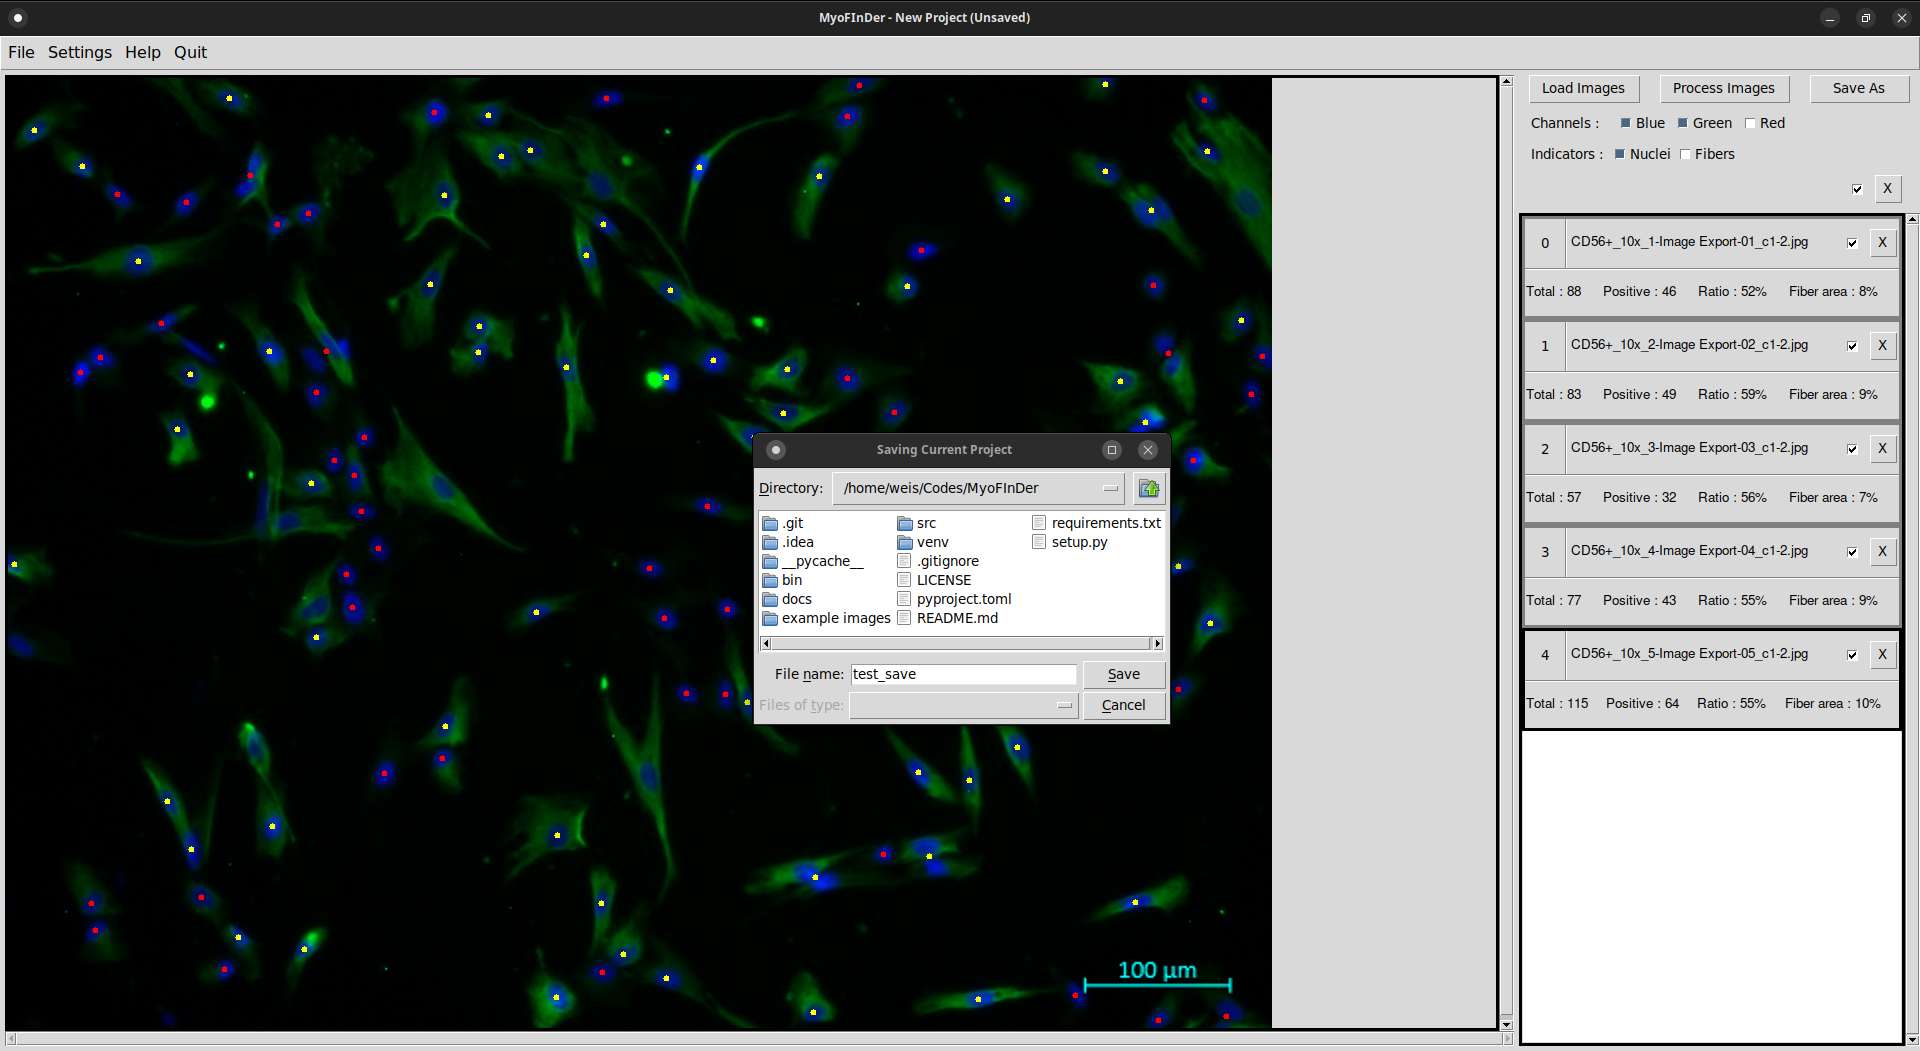
A file explorer then appears, in which you have to specify the folder in which to save the project. First, place the file explorer in the parent folder that will contain your project folder. Then, enter the desired name for the project folder in the File name field of the explorer, and validate using the Save button. Projects can only be saved in new folders, not in existing ones.
If you look inside a saved project folder, you will find first an Excel file
containing a summary of the detected nuclei and fibers for each image in
the project. Then, a settings.pickle file contains the setting values at the
moment when the project was saved. The data.pickle files contains the
location and nature of all the detected nuclei and fibers. The original images
are copied and saved to the Original Images folder. Optionally, if the Save
Images with Overlay setting is enabled, an Overlay Images folder contains
the images with an overlay showing the detected fibers and nuclei.
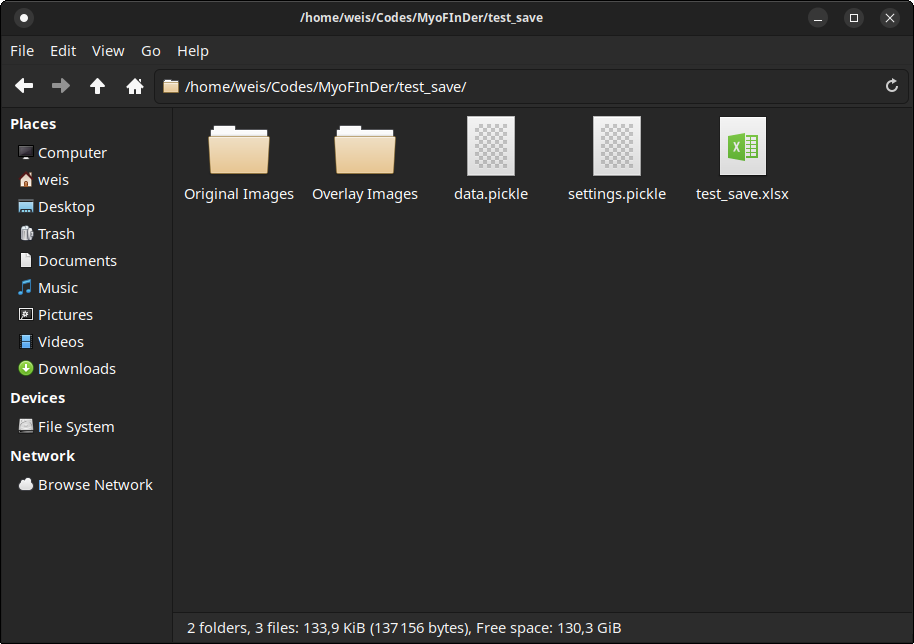
The
.picklefiles are binary files that are not directly readable.
3.2 Loading data from an existing project
To load data from an existing project, first click on the Load From Explorer button in the File menu.
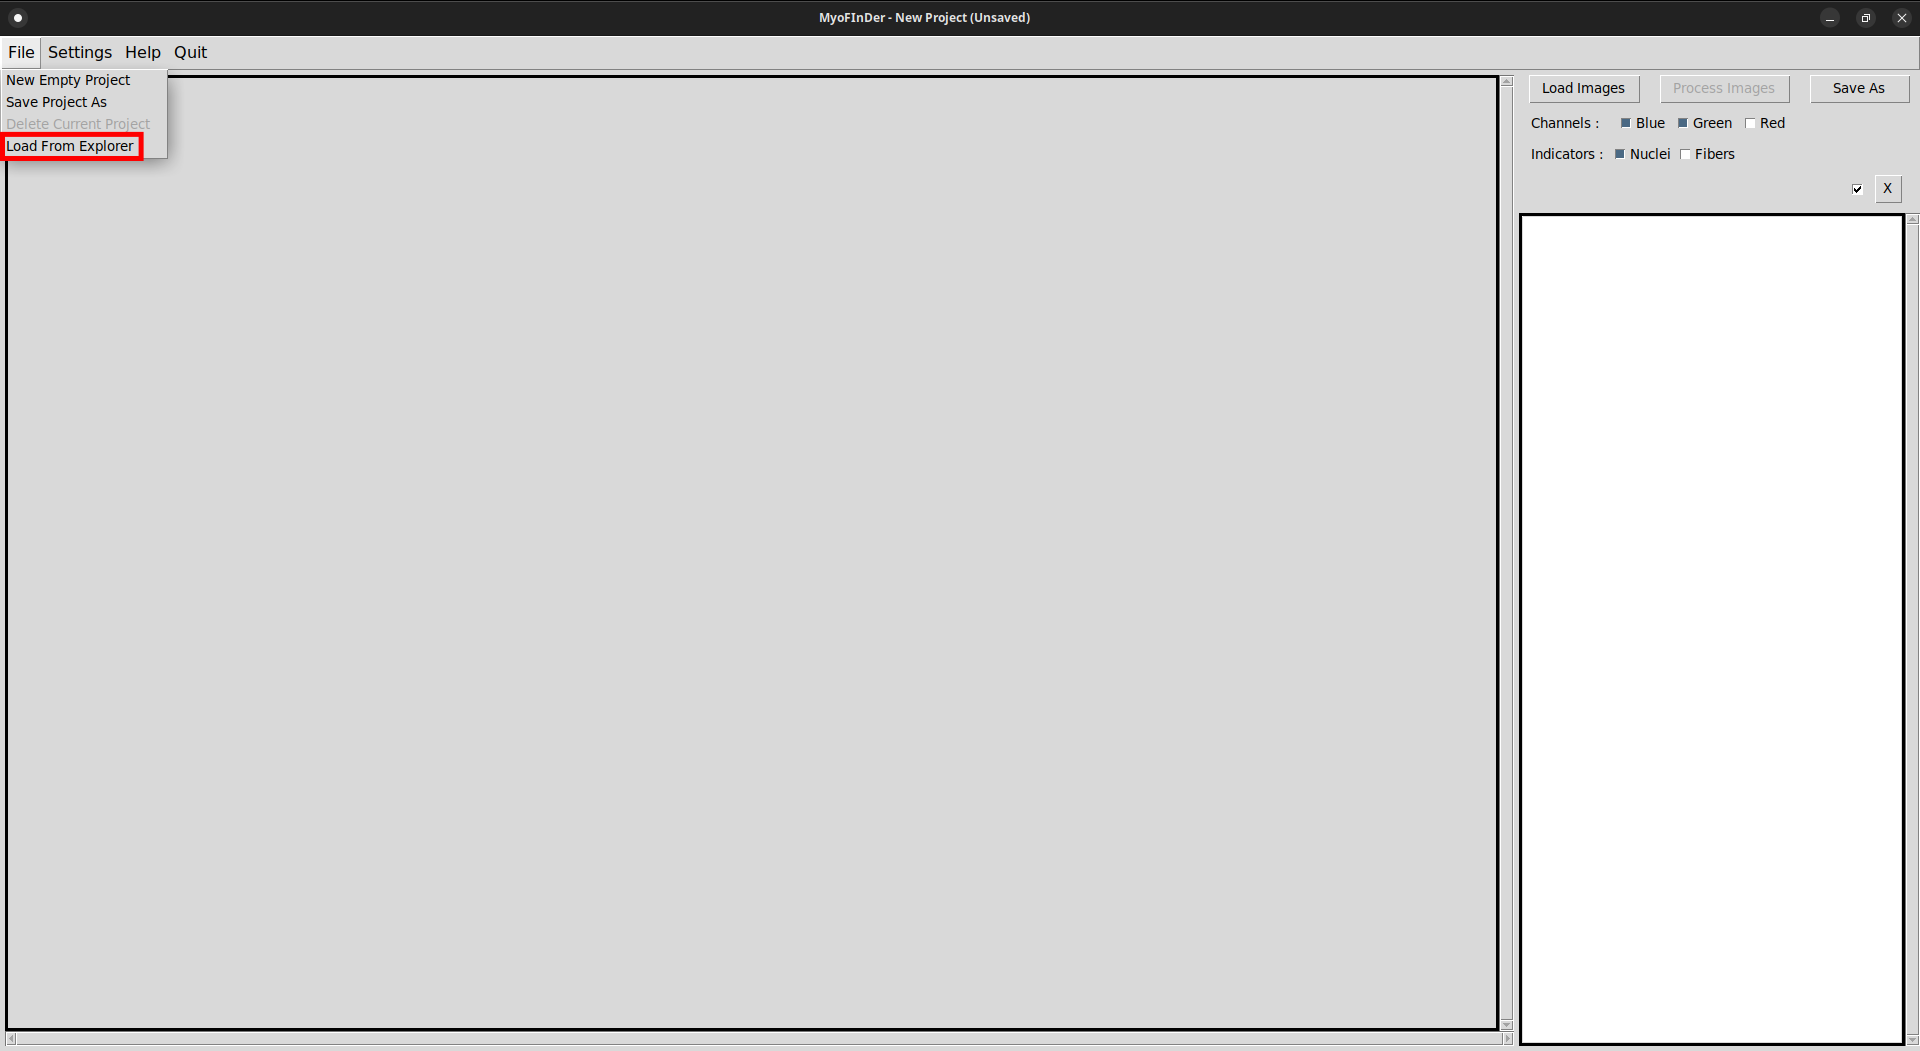
A file explorer then appears, in which you have to select the project folder to load. It is not sufficient to simply have the name of the folder highlighted, you need to double-click on it to place the explorer inside the folder to open. Once you are inside the project to open, validate your choice using the Ok button.
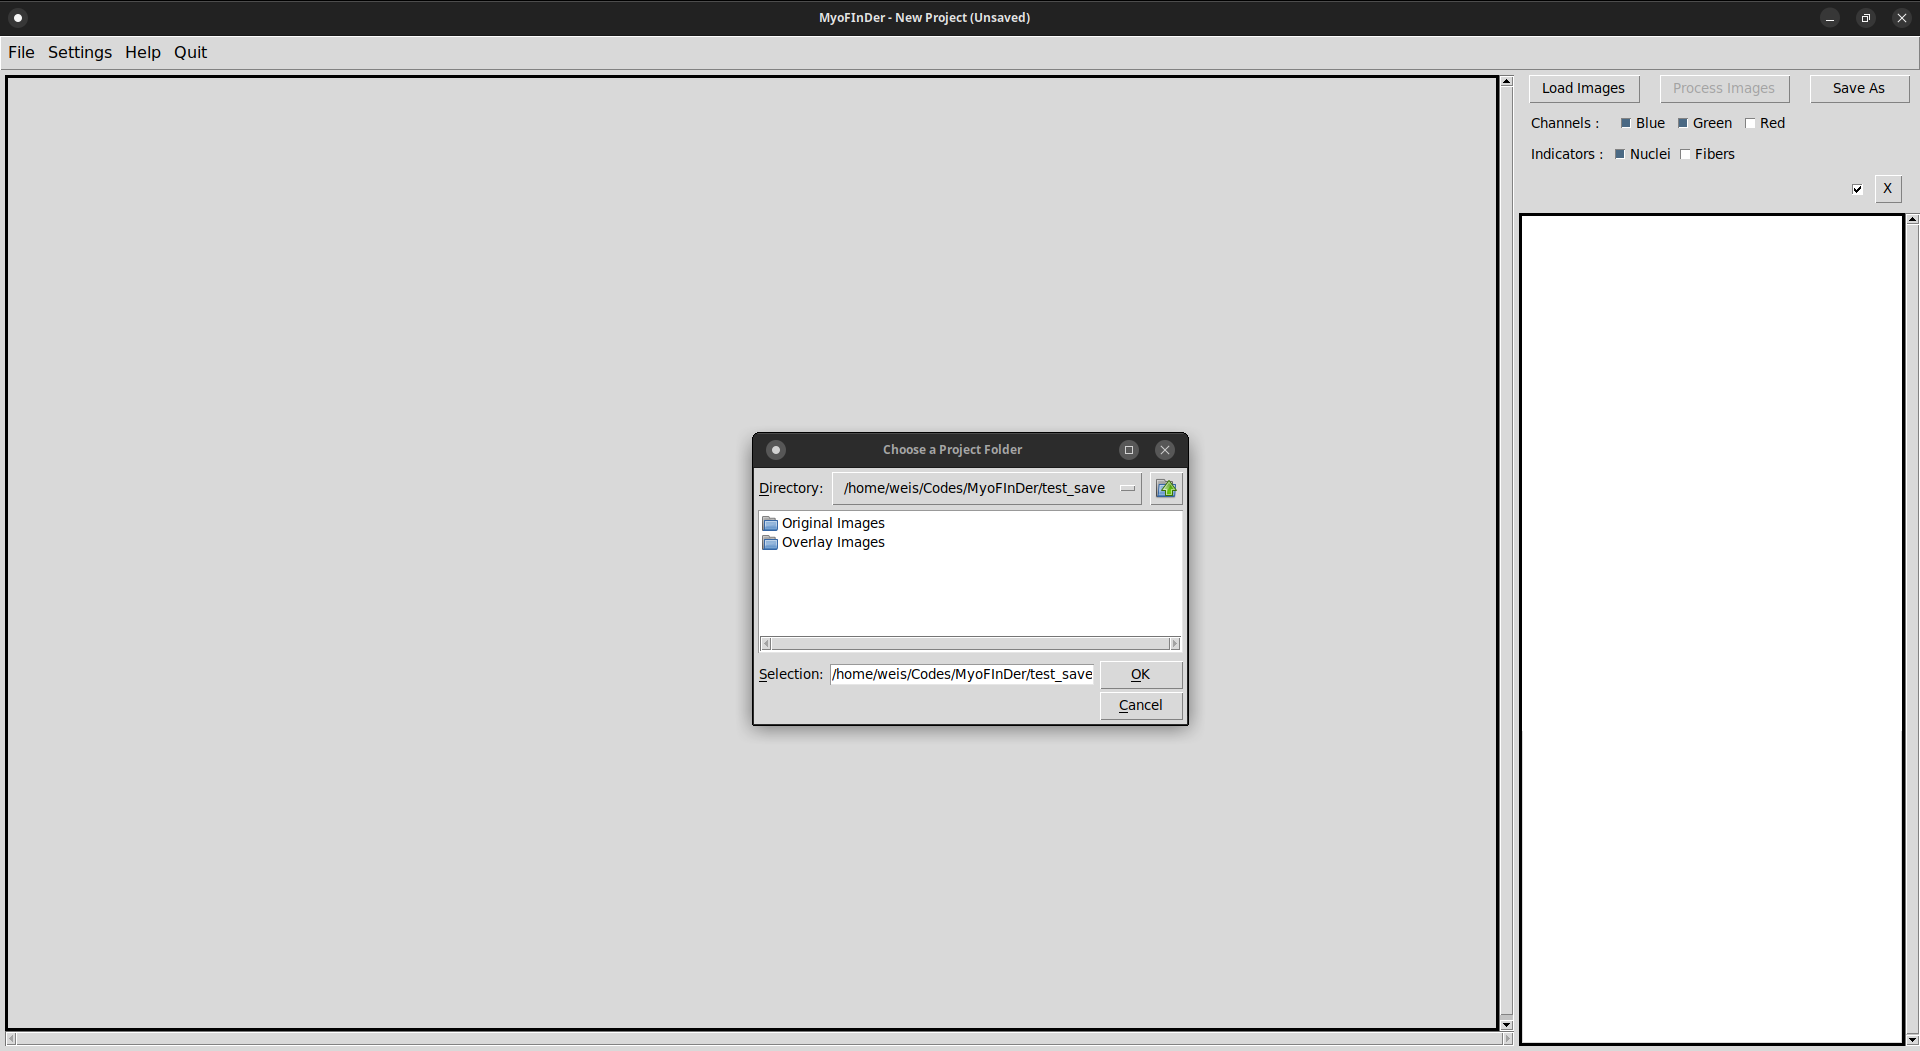
After loading the project, all the images it contains should be listed in the information frame and the detected nuclei and fibers should also appear in the nuclei and fiber overlays.
3.3 Operations on saved projects
The saved projects can be located anywhere on the computer, preferably in folders where MyoFInDer has read and write access. Because they contain all the information needed to reconstruct a project, the project folders can be renamed or moved, including to a different computer. They can also be compressed for sharing. The project folders can be safely deleted, with no impact on the behavior of MyoFInDer.
4. Advanced usage
4.1 Command-line options
Two command-line options are available when starting MyoFInDer from the console.
The first one allows to disable logging, by adding the -n or
--nolog option. It disables both the display of log messages in the console,
and recording of the log messages to the log file.
The second option is for testing only. It will initialize the interface in
a normal way, but close it right away. This behavior is enabled by passing the
-t or --test option.
The third command-line option, added in version 1.0.8, is the -f or
--app-folder option. It allows to specify the path to the directory where to
read and store the application files, such as the log file or settings file.
4.2 Retrieving the log messages
The log messages are, if possible, recorded to an application folder whose
location depends on the OS. On Linux and macOS, the application folder is
located in /home/<user>/.MyoFInDer. On Windows, the application folder
is located in C:\Users\<user>\AppData\Local\MyoFInDer. This application
folder normally contains the log messages for the last run of the application,
as well as a settings.pickle file containing the last used settings.